Easy Butternut Squash Soup


We are definitely in the heart of the fall season and cozy recipes are required! It’s the time of year where we feel the need for those comfort meals as the days get darker, quieter and colder. We crave the cozy warm recipes that just make us feel good inside. This is my favourite season to create recipes. I get so inspired by all the foods in season during this time. Everything looks absolutely delicious and I start to think of all the recipes I want to try making. It’s just simply a wonderful time of year!

Many people will say that during this time of year they typically put on weight because they eat more decadent meals. Some say they crave “bad” foods. I feel like anything that’s a favourite cozy fall meal can be made into a healthier version. You can enjoy the wonderful much loved meal and still stay on track with wellness goals. I love to create meals that are guilt free and healthy but still taste fabulous. I know I’ve said this before but you CAN have it all! No more beating yourself up about eating naughty meals! You just have to get in the mindset of adjusting the recipe to meet your health and wellness goals. Also I’d like to add that if you do enjoy indulgent meals here and there, that’s also totally ok. It’s all about balance in life. I say just clean up your act and eat as clean as possible after that meal. It will be just fine.

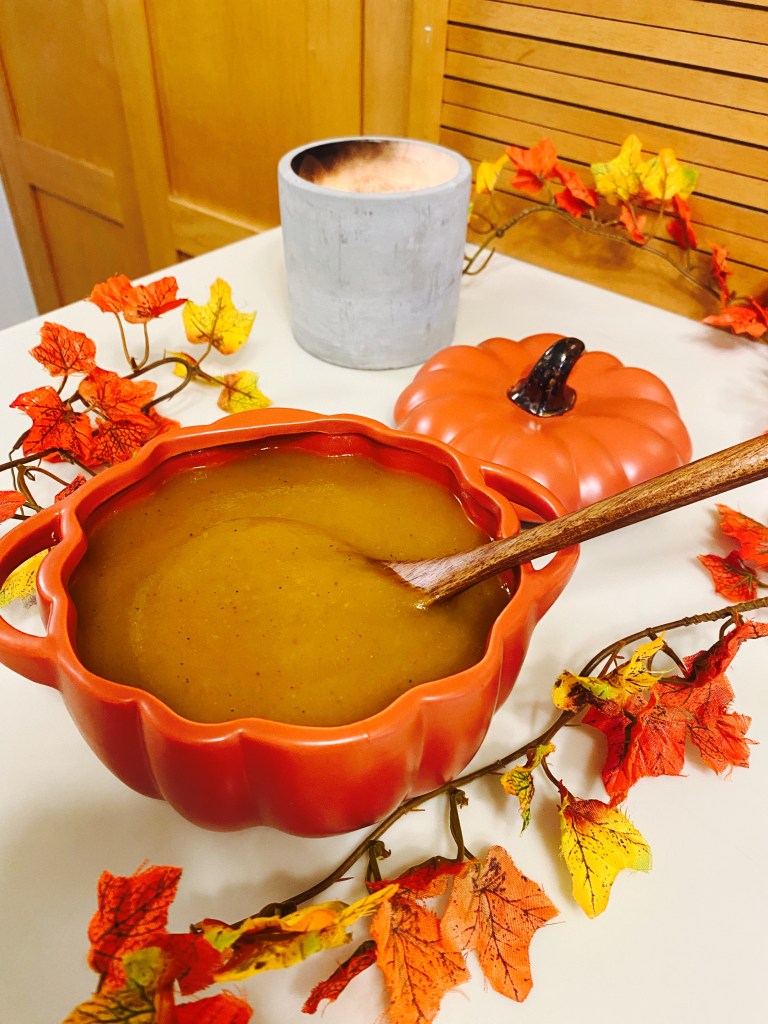
I created this very simple butternut squash soup recipe using wholesome ingredients and it tastes fantastic. This recipe is a crowd pleaser and it’s perfect for entertaining during the holiday season as well. Now that covid restrictions have lightened up and families can get together we can finally start having guests over! Wow this is exciting! Everyone will enjoy this soup! My feedback after posting this recipe on my YouTube channel was excellent. I feel so good knowing that people are enjoying this hearty yet healthy soup!

Squash is abundant in every grocery store or farmer’s market this time of year. It’s definitely easy to find because they seem to be the star of the show in October and on into the colder months. Squash can be inexpensive as well and it’s quite hearty. You can make this whole recipe using just one butternut squash. A little goes a long way. My recipe will serve 4 people, so if you want to make it for a larger gathering then just make sure you pick up extra squash. I bought mine from Costco and they actually came in a two pack which is great. They worked out to 3.5 lbs each.

What if you don’t have fresh produce available to you? Depending on where you live or your budget you might not be able to get fresh squash. That’s totally ok! You can definitely use canned squash of any variety to make this recipe if needed. They do sell butternut squash in cans so this might be a good solution for you. You can also use frozen squash if that’s all you can find as well. Find whatever works for you because my recipe is very adaptable. Creating these healthier options doesn’t have to be complicated. I find sometimes we get into these rigid rules when cooking and that is just way too stressful. We tend to over complicate things and it doesn’t have to be this way.

Butternut Squash is full of Vitamins, Fiber and Antioxidants. It’s loaded with vitamin C, vitamin A, and B Vitamin’s as well. It’s rich with magnesium and potassium which plays an important role for us in our bone health. It’s so nice to know that something so delicious is actually really beneficial to our health.

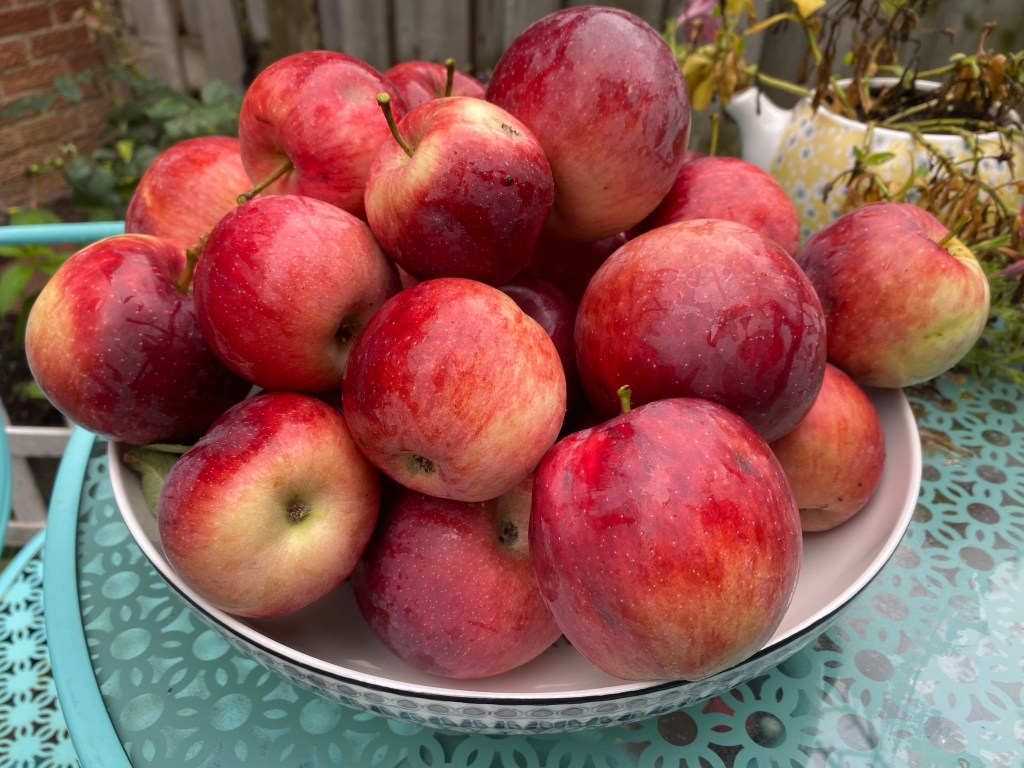
I decided to add some apples to this recipe because we had picked a whole bunch from our tree in the backyard. They needed to be used up and they taste so incredibly good! I’m not sure what the variety is but they grow perfect and I love how sweet they are. I don’t put any pesticides on my tree and they still turn out perfect. No bugs either! The only battle I have is the Toronto raccoons eating them on the tree and then throwing half away onto the ground. They basically eat half of the apple and throw away the rest! Ugh! Why can’t they just eat the whole thing?

Fresh Apples from my Backyard!

I hope you enjoy my easy Butternut Squash Soup recipe. Let me know if you make it and if you make an adjustments to the recipe. I will post the video version of this recipe below if you would like to watch me cook this lovely soup. Enjoy this amazing time of year and the gorgeous fall season!


Easy Butternut Squash Soup

Ingredients:

⁃ 1 Butternut Squash, peeled & chopped Look for one around 3.5 lbs.

⁃ 1 tbsp. Bouillon

⁃ 4 1/4 cups water

⁃ 1/2 onion, chopped

⁃ 3 medium sized apples, chopped

⁃ 3 cloves of garlic

Herbs & Spices:

⁃ Paprika

⁃ Curry powder

⁃ Onion powder

⁃ Cumin powder

⁃ Dry Oregano

⁃ Black pepper

⁃ Himalayan pink salt


Method:

1. Preheat oven to 400F

3. Peel & chop the butternut squash. Add it to a lined baking pan.

4. Peel and chop apples and add them to the baking pan.

5. Chop up onion and peel garlic cloves. Toss into the pan. Add the spices to the mixture as well.

6. Pop the baking pan into the oven at 400F for 30 minutes. I gave it a mix at the half way mark.

7. Add the butternut squash mixture to a large pot. Add the bouillon, and water as well.

8. Use a hand blender to purée the soup or add it in batches to a blender.

9. Add more spices if necessary according to you taste.

10. Add the soup to bowls and enjoy!

Note: garnish with some pumpkin or squash seeds on top if desired.

Enjoy!!!

Health, Joy & Positive Vibes,

Debbie

~VeganMommyDee~

Raw Vegan PB Cheesecake love!

VeganMommyDee's Raw Vegan PB Cheesecake

VeganMommyDee’s Raw Vegan PB Cheesecake


I made one of my favourite cheesecakes earlier this week … raw vegan peanut butter cheesecake! Anyone who knows me well knows that I’m a PB and over all nut freak. PB makes everything perfect! This was my 1st try making this cheesecake and I’m really happy with the outcome. So happy indeed that I’m sharing my recipe with you all right away. I’ve had many people ask me for this recipe once I posted a picture of it on Instagram. My new years resolution was to try and put pen to paper and actually write down my recipes so I did just that when I made this cheesecake. I’m not a fussy person and I love to bake and cook so I’ve become the queen at winging my recipes. I barely measure and don’t fuss about exact measurements. When people ask me for recipes, ask me to please consider writing a cookbook or teach cooking classes this becomes a problem however. I blame the way I am because of my mom (just joking) because she never used measurements when I used to cook/bake with her as a child. She intern leaned the a little of this and a bit of that type of measuring from her mother as well. I’m breaking the cycle now and these days I’ve made a conscious effort to try and write down the measurements that I’m using when I’m cooking or baking. So going back to this awesome raw cheesecake I didn’t overly sweeten mine so if your a major sweet tooth then add more sugar to your cheesecake. I’m a sweet tooth who has converted to an almost sugar free lifestyle so I try and limit how sweet I make my desserts. It’s really difficult sometimes but I just try and use dates and stevia when baking in order to make my desserts as healthy has possible. I love the natural sweetness that dates bring to desserts and what’s even better is they have many nutritional benefits. Hooray!


Here is my very simple recipe …


Raw Vegan Peanut Butter Cheesecake


You will need:

  • 1 spring form pan ( I use a 9″ pan )
  • 1/3 cup Pure organic coconut oil
  • 1  400 ml can of coconut milk ( you will only use 1/2 of the can however)
  • 5 cups Raw cashew halves
  • 1 TBSP Maple syrup
  • 2 cups Medjool dates
  • 3 Powdered Stevia packets
  • 1/3 cup vegan mini chocolate chips
  • 1 1/2 cup Unsweetened natural peanut butter
  • Food processor


Method:

  1. The 1st step which is the most important step of all is soak your cashews for at least 4 hours before making this recipe. I prefer to soak mine overnight. I just put the cashews in a glass bowl and cover them with fresh water the night before I’m making any cheesecake.
  2. Soak your dates in very warm water for 10 – 15  minutes so they can soften and become really plump. I also pop the can of coconut milk into the fridge while my dates soak. I find when the can is cold the cream becomes a little thicker and easier to scoop up after.
  3. You are going to start off with making the crust for the cheesecake by adding 2 cups of the raw cashews into the food processor with 7 pitted dates. Process until the dates have been incorporated well.
  4. Lightly oil your spring form pan with a little coconut oil
  5. Transfer the crust mixture into the spring form pan and press down well and evenly distribute it around the base of your pan.
  6. Now you can go ahead and make your filling by adding the following ingredients into the food  processor:                                                                                                                                                                                                              The remaining 3 cups of the the raw cashews, 1 TBSP of maple syrup, 1/3 cup coconut oil, 3 packets of stevia,  1  1/2 cup peanut butter, 1/2 of the can of coconut oil (skim the thickening coconut cream from on top as you don’t want the liquid for this recipe) and the remaining pitted dates. Process very well. Make sure to scrape down the processor’s bowl in order to make sure everything is combining well.
  7. Once combined well and it’s a nice creamy consistency then add your filling into the spring form pan and smooth it out evenly.
  8. Top with mini vegan chocolate chips
  9. Pop it into the freezer to set for at least 4 hours so the cheesecake can set nicely.
  10. Remove it from the freezer about 20-30 minutes before your want to slice it up and serve it. You can keep any left over slices in the fridge in an air tight container.

So incredibly easy to make right? The only thing you have to remember to do is soak your nuts and your dates so that your cheesecake turns out wickedly good! 🙂

Enjoy!

~Debbie~

*Remember to visit me on Instagram and take a look at how I try and live a healthy balanced lifestyle! I’m VeganMommyDee on there as well.*


A lovely slice of VeganMommyDee's Raw Vegan PB Cheesecake!

A lovely slice of VeganMommyDee’s Raw Vegan PB Cheesecake!


Pancake Tuesday!

It's Shrove Tuesday / Pancake Tuesday today!

It’s Shrove Tuesday / Pancake Tuesday today!


It’s Pancake Tuesday, Shrove Tuesday or Fat Tuesday … whatever ya wanna call it it’s fine by me! If you’re not familiar with it then just click on Shrove Tuesday & Fat Tuesday and the links will fill you in. As per tradition I made pancakes for my kids to enjoy this morning. I put together some super fast and easy pancakes while packing school lunches and getting my crew out the door on time. I made super Cinnamon vegan pancakes and Cinnamon & Blueberry pancakes as per my 9 year old’s request. When I’m in a big hurry (like today) I use a premixed flour pancake mix sometimes which contains healthy whole grains like brown rice, teff, spelt and quinoa flour. I like having a bag of the premixed flour handy but they sometimes contain sugar and I prefer sugar-free options. To sweeten my pancakes I’ve only been using sugar-free powder stevia and I love the results! I find the liquid stevia way too bitter in taste however so I stick to the powder form. That way the only sugar we are actually putting on our pancakes is the 100% natural Canadian maple syrup and the natural sweetness from the berries. I sometimes skip the maple syrup and just add a touch of pure organic coconut oil on top as an even healthier alternative … yea bring on the yummy good fats! Below is the in a rush on a school day recipe I used this morning 🙂


CINNAMON / BLUEBERRY CINNAMON PANCAKES


Ingredients:

  • 1 cup of your favourite flour mix
  • 1 tsp. aluminum free Baking Powder
  • 1/4 cup filtered water
  • 1/3 -1/2 cup unsweetened almond milk
  • 1 melted tbsp. of coconut oil
  • 3 packets of stevia
  • 3 tbsp. flaxmeal mixed with 9 tbsp. of water, let sit for a couple of minutes to thicken up
  • 1 tbsp. cinnamon, or to taste
  • 1 pint of blueberries, I usually save some for garnish on top
  • You will also need vegan butter or coconut to coat your pan for cooking


Method:

  1. Mix your flaxmeal with water and let it sit.
  2. In a medium-sized bowl add the flour, baking powder, cinnamon, and stevia. Mix well.
  3. Heat a frying pan with a vegan butter or coconut oil
  4. In a small bowl add the water, milk and the coconut oil and mix well. When adding the milk add in 1/3 cup and you can add more if needed afterward.
  5. Add the wet ingredients into the dry. Add in extra milk if you find your batter is too dry. Also add in the flaxmeal as well and combine. Don’t over mix however or your pancakes wont be as fluffy.
  6. Transfer the pancake mix to your preheated frying pan or griddle. They cook up fast so keep an eye on them.


NOTE:

  • As far as the blueberries go I usually add them in to my batter once I’ve made some plain cinnamon ones as some of my kids prefer them without the blueberries. Then I gently add the blueberries into the batter and cook up the rest.


*This recipe makes about 6 good-sized pancakes so I normally double it.*


Enjoy! 🙂

Banana Blueberry Oat Cookies!

Healthy Banana Blueberry Oat Cookies!

Healthy Banana Blueberry Oat Cookies!


My recipe for Banana Blueberry Oat Cookies only has 4 ingredients in them …yes only 4! I want to be able to enjoy a cookie or treat without all the guilt associated with it, which is one of the reasons why I like to come up with my own recipes. The other reason is I strive to eat healthy on a daily basis. I want to be able to eat a cookie that only contains a few ingredients not chemical sugar loaded junk that’s found on super market shelves! These cookies have no added sugar in them! The bananas add enough sweetness so I don’t add any extra sugar to them. I’ve been trying to stick to sugar free snacks now and I’ve also been experimenting with stevia as an alternative. I’m also on a fitness quest so it’s important to for me to not set myself backwards by eating unhealthy treats. These simple cookies are so easy to take on the go too which is super handy when the hunger bug hits ya and all you have around you is junk food/fast food. They are very helpful to me when my daughter is at glee club and dinner time is approaching. All they have in the community center are vending machines full of junk! Tempting at times but no thanks I’ll just enjoy a healthy banana blueberry oat cookie instead! 🙂


Banana Blueberry Oat Cookies 


Ingredients:

  • 1 cup gluten free old fashion rolled oats (I use Bob’s Red Mill organic brand)
  • 2 organic mashed banana
  • 1 tsp. cinnamon, or to taste
  • 1/3 cup blueberries


Method:

  1. Preheat oven to 325 F
  2. Line a baking sheet with parchment paper
  3. Mash the two bananas in a medium sized bowl
  4. Add the oats and cinnamon. Combine really well.
  5. With a spoon scoop out the mixture and place on the baking sheet to make your cookies. Make them whatever size you prefer and top each cookie with desired amount of blueberries.

Note:

*  You can also gently add the blueberries into the mixture before you scoop it out to make your cookies. I don’t prefer to however because I think they look pretty topped with the blueberries and I don’t risk breaking them in the batter. *

* These quantities made 9 cookies for me*


Enjoy! 😀