Raw Vegan PB Cheesecake love!

VeganMommyDee's Raw Vegan PB Cheesecake

VeganMommyDee’s Raw Vegan PB Cheesecake


I made one of my favourite cheesecakes earlier this week … raw vegan peanut butter cheesecake! Anyone who knows me well knows that I’m a PB and over all nut freak. PB makes everything perfect! This was my 1st try making this cheesecake and I’m really happy with the outcome. So happy indeed that I’m sharing my recipe with you all right away. I’ve had many people ask me for this recipe once I posted a picture of it on Instagram. My new years resolution was to try and put pen to paper and actually write down my recipes so I did just that when I made this cheesecake. I’m not a fussy person and I love to bake and cook so I’ve become the queen at winging my recipes. I barely measure and don’t fuss about exact measurements. When people ask me for recipes, ask me to please consider writing a cookbook or teach cooking classes this becomes a problem however. I blame the way I am because of my mom (just joking) because she never used measurements when I used to cook/bake with her as a child. She intern leaned the a little of this and a bit of that type of measuring from her mother as well. I’m breaking the cycle now and these days I’ve made a conscious effort to try and write down the measurements that I’m using when I’m cooking or baking. So going back to this awesome raw cheesecake I didn’t overly sweeten mine so if your a major sweet tooth then add more sugar to your cheesecake. I’m a sweet tooth who has converted to an almost sugar free lifestyle so I try and limit how sweet I make my desserts. It’s really difficult sometimes but I just try and use dates and stevia when baking in order to make my desserts as healthy has possible. I love the natural sweetness that dates bring to desserts and what’s even better is they have many nutritional benefits. Hooray!


Here is my very simple recipe …


Raw Vegan Peanut Butter Cheesecake


You will need:

  • 1 spring form pan ( I use a 9″ pan )
  • 1/3 cup Pure organic coconut oil
  • 1  400 ml can of coconut milk ( you will only use 1/2 of the can however)
  • 5 cups Raw cashew halves
  • 1 TBSP Maple syrup
  • 2 cups Medjool dates
  • 3 Powdered Stevia packets
  • 1/3 cup vegan mini chocolate chips
  • 1 1/2 cup Unsweetened natural peanut butter
  • Food processor


Method:

  1. The 1st step which is the most important step of all is soak your cashews for at least 4 hours before making this recipe. I prefer to soak mine overnight. I just put the cashews in a glass bowl and cover them with fresh water the night before I’m making any cheesecake.
  2. Soak your dates in very warm water for 10 – 15  minutes so they can soften and become really plump. I also pop the can of coconut milk into the fridge while my dates soak. I find when the can is cold the cream becomes a little thicker and easier to scoop up after.
  3. You are going to start off with making the crust for the cheesecake by adding 2 cups of the raw cashews into the food processor with 7 pitted dates. Process until the dates have been incorporated well.
  4. Lightly oil your spring form pan with a little coconut oil
  5. Transfer the crust mixture into the spring form pan and press down well and evenly distribute it around the base of your pan.
  6. Now you can go ahead and make your filling by adding the following ingredients into the food  processor:                                                                                                                                                                                                              The remaining 3 cups of the the raw cashews, 1 TBSP of maple syrup, 1/3 cup coconut oil, 3 packets of stevia,  1  1/2 cup peanut butter, 1/2 of the can of coconut oil (skim the thickening coconut cream from on top as you don’t want the liquid for this recipe) and the remaining pitted dates. Process very well. Make sure to scrape down the processor’s bowl in order to make sure everything is combining well.
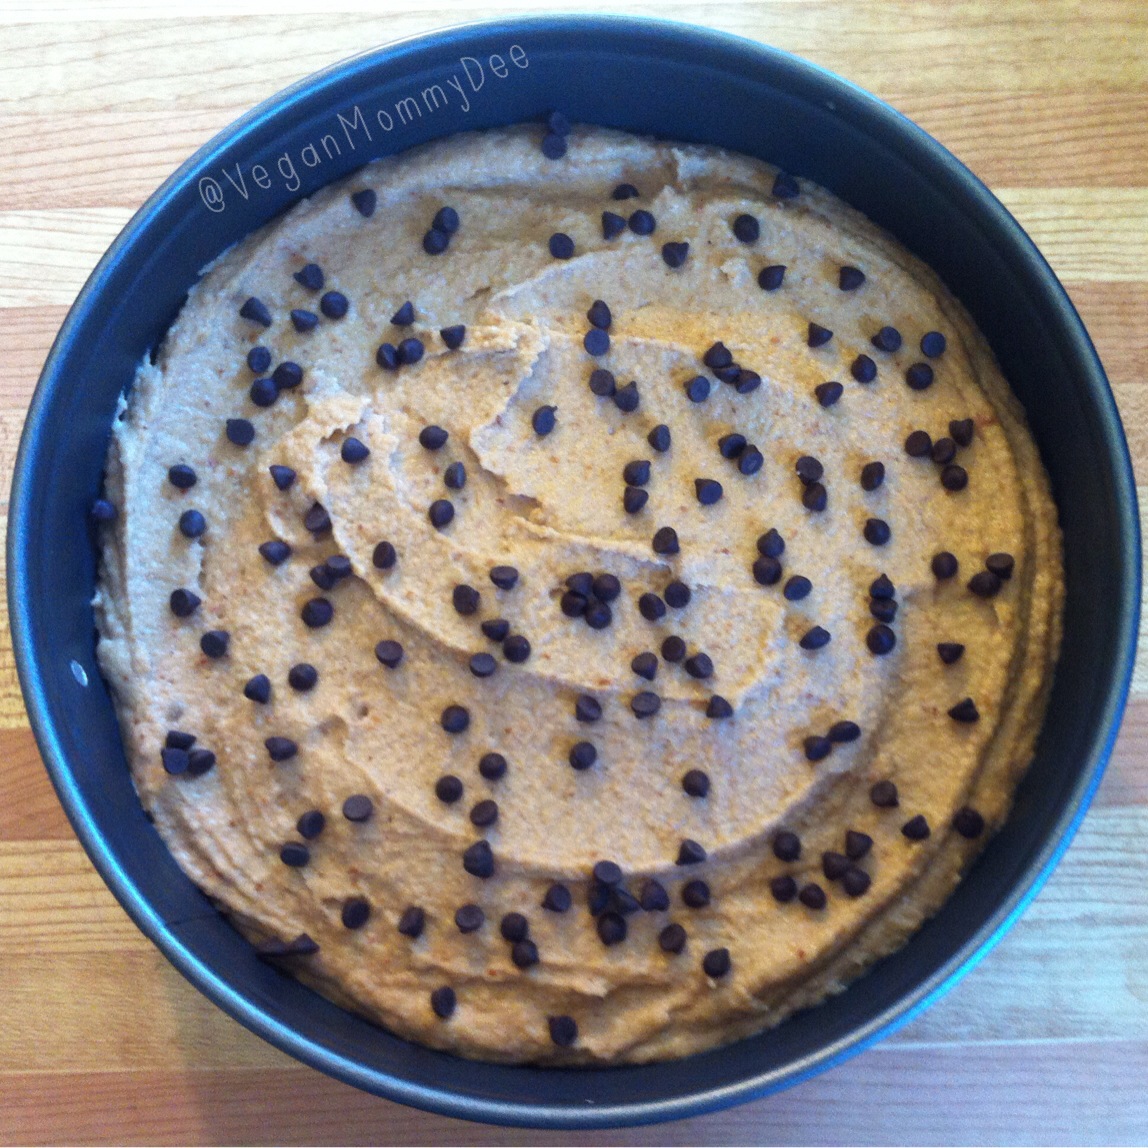
  7. Once combined well and it’s a nice creamy consistency then add your filling into the spring form pan and smooth it out evenly.
  8. Top with mini vegan chocolate chips
  9. Pop it into the freezer to set for at least 4 hours so the cheesecake can set nicely.
  10. Remove it from the freezer about 20-30 minutes before your want to slice it up and serve it. You can keep any left over slices in the fridge in an air tight container.

So incredibly easy to make right? The only thing you have to remember to do is soak your nuts and your dates so that your cheesecake turns out wickedly good! 🙂

Enjoy!

~Debbie~

*Remember to visit me on Instagram and take a look at how I try and live a healthy balanced lifestyle! I’m VeganMommyDee on there as well.*


A lovely slice of VeganMommyDee's Raw Vegan PB Cheesecake!

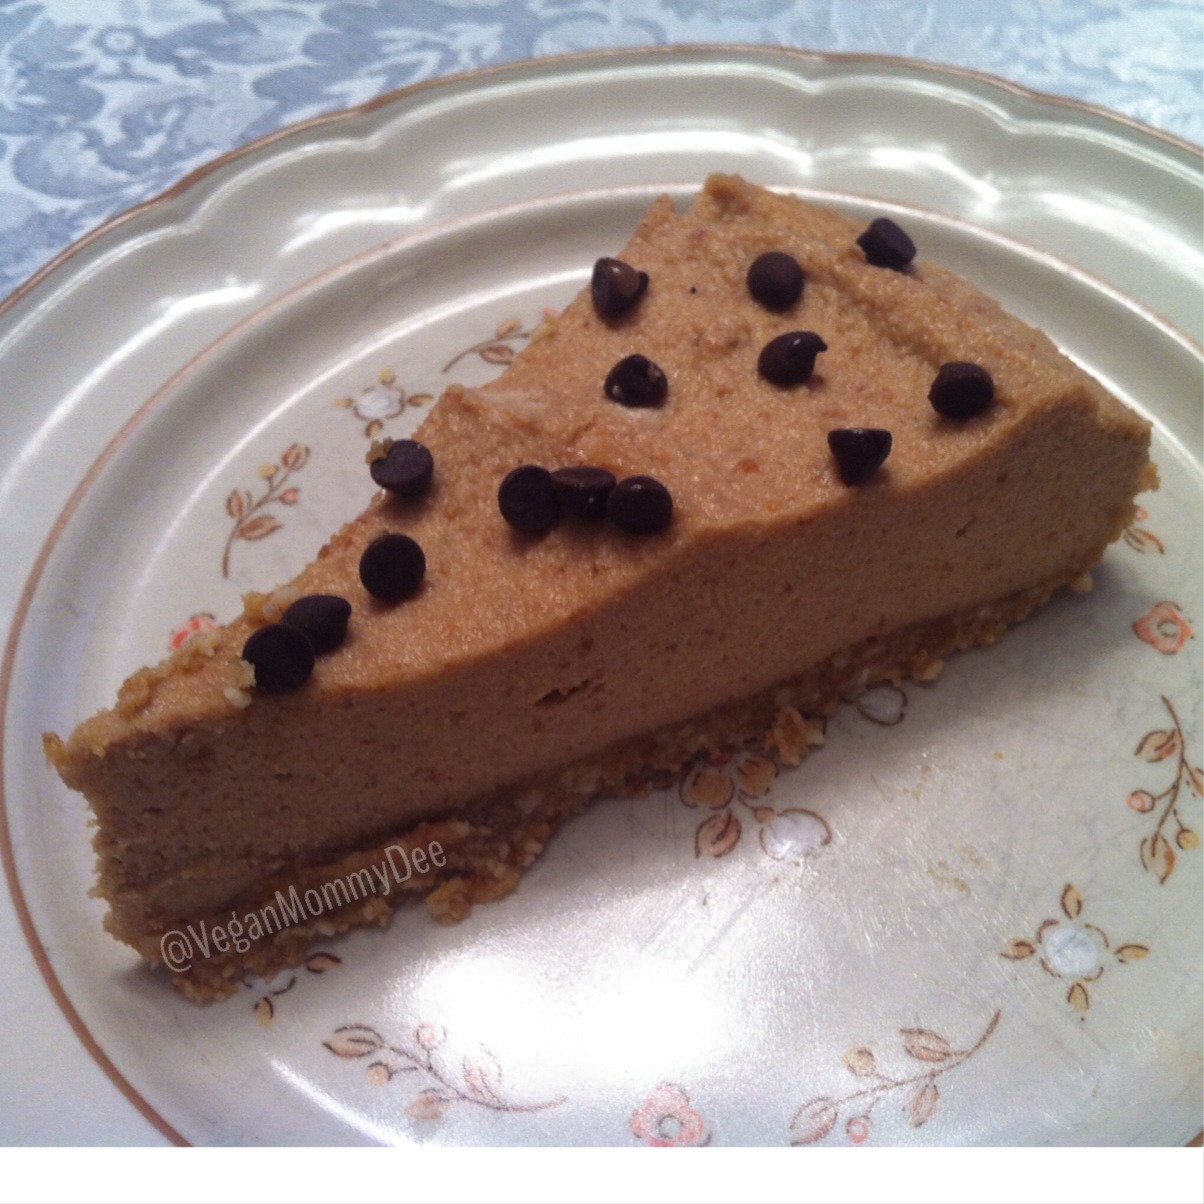
A lovely slice of VeganMommyDee’s Raw Vegan PB Cheesecake!


My Raw Vegan Pumpkin Pie!

I’m finally posting the recipe for my Raw Vegan Pumpkin Pie !!! Many people have asked me for this recipe so here it is! It’s super easy to make and so far everyone who has tried it has loved it! When I cook and bake I pretty much always just eyeball the quantities of my ingredients. Not good when your being asked for your recipes often! I’ve now forced myself to pay attention to the quantities and write down my recipes as I go. This recipe is easily adapted so adjust the spice amounts as desired. Everyone is different. Some people like their pie mild in flavor and others like it strong. I’m kinda of a mid range person and that’s what my recipe reflects. As far as nuts go I prefer to use raw cashew halves in my pie filling as well as the crust. I’ve done it with walnuts and it turns out good in flavor but I find the texture of the pie is much better when I use cashews. So although Thanksgiving has already passed for us in Canada I still made another raw pumpkin pie this week. Hey it’s still fall so I think it’s still appropriate! For my lovely American friends & family this recipe is coming to you in perfect timing! Your welcome! 🙂


My Raw Vegan Pumpkin Pie


RAW VEGAN PUMPKIN PIE


Ingredients for the crust:

  • 1 cup raw cashew halves (no need to soak the nuts for the crust)
  • 1 tbsp. unsweetened shredded coconut
  • 2 medjool dates, pitted


Ingredients For the pie filling:


  • 1 1/2 cup raw soaked and drained cashew halves
  • 1/2 cup pure maple syrup or agave
  • 1 1/2 cups pure pumpkin puree (Not pumpkin pie filling!)
  • 1/2 tsp. pure vanilla extract
  • 1 heaping tbsp.’s cinnamon, or to taste
  • 2 tsp. pumpkin spice, or to taste
  • 3 heaping tbsp.’s coconut oil
  • 10 medjool dates, pitted


You will also need:

  • 1 pie plate or desired dish
  • food processor
  • large bowl
  • medium-sized bowl
  • kettle


* For best results soak your cashews over night!!! Add the 1 1/2 cups raw cashew halves into a large bowl and cover with water. Give it a quick mix and leave them overnight on your countertop. *


Method:


  1. Place the dates in a medium-sized bowl and add boiled water to them from your kettle. Let them sit there 10-20 minutes to soften up.
  2. After your dates have softened you can remove 2 from the bowl and after pitting it add it to the food processor. Your now going to make your pie crust. Add in the 1 cup of raw cashews and the 1 tbsp. of shredded coconut. Use the pulse option in order to just combine the ingredients slightly. I then use the low setting on my food processor to combine the ingredients well.
  3. Remove the crust ingredients and add them to your pie plate. Use your fingers to press down the mixture and spread it out evenly. Set aside.
  4. Remove the other 10 dates from the water and remove the pits. Add them to the food processor.
  5. Strain the water out of your 1 1/2 cups cashews and add them to your food processor as well.
  6. Add in the 1 1/2 cups pure pumpkin puree, 1 heaping tbsp. cinnamon, 2 tsp. pumpkin spice and the 1/2 tsp. pure vanilla extract.
  7. Next add the 3 heaping tbsp.’s of coconut oil
  8. Pulse to just chop everything slightly and then use the high-powered option and blend well. I stop mine and use a spoon to scrape down the sides of the processor a couple of times in order to make sure that the nuts puree well.
  9. It should be a beautiful smooth consistency. Taste and adjust the spice as needed at this point.
  10. Transfer the pie filling into your pie plate. Smooth it out evenly and cover it up with clear cling wrap.
  11. Pop it into the freezer for at least 4- 6 hours until it’s set and firm. Once it’s set really well you can place it into the fridge. Take the pie out a few minutes before your going to slice and serve it so that it comes to room temperature.


* I’ve also been known just kept my pies in the freezer and only cut the slices I need. I let them come to room temperature and serve them.  My kids enjoy adding whipped cream on top of their pie slice but I eat mine plain. I think it’s perfect just like that!  🙂


Enjoy!


Raw Vegan Pumpkin Pie


Healthy Oat Bars

Here is my favourite recipe for healthy oat bars! I love this recipe that I came up with because it’s made with healthy dates and prunes. Dates have iron, calcium and fiber in them as well as countless other healthy benefits. Prunes also have fiber in them as well as vitamin C, A, K and they are said to be a good anti colorectal cancer food choice. I really like how the dates and prunes act as a sweetening agent in the recipe! I’ve added the option of adding pure maple syrup to them as well if desired. I’ve made them with and without the maple syrup and both ways taste really good to me. The maple syrup adds a bit of extra sweetness and of course a tasty kick to the bars though. I love oat bars because they are easy to make and can be a great snack to eat on the go! Another bonus is that this recipe is flour free too!

|**The bars do have almonds in them but you can make them nut free if allergies are a concern. **


Healthy Oat Bars


Ingredients:

  • 2 Cups Gluten Free Oats
  • 1 TBSP Cinnamon
  • 3/4 Cup Cranberries or other dried sulfate free fruit of choice
  • 3 TBSP Flaxmeal
  • 1/2 cup finely chopped almonds
  • 1/2 tsp – 1 tsp vanilla extract
  • 2 TBSP Pure Maple Syrup (optional)
  • 12 Dates (I soak mine over night to make them easier
  • 6 Prunes
  • 1/3 cup warm water
  • 1/3 cup pumpkin seeds or you can substitute another seed


You will also need these simple items …

  1. Food Prosser or high-powered blender
  2.  You will need a baking pan. Depth will depend on how thick you want your bars to be.
  3. Parchment paper to line your baking dish or coconut oil to oil your dish with.


Method:

  1. Preheat oven to 350
  2. In a food processor add the dates and prunes
  3. Add 1/3 cup warm water into the food processor and process until smooth. Add more water if needed until it’s well combined. Also add the vanilla extract and combine all ingredients well.
  4. In a large bowl add the oats, cinnamon, pumpkin seeds and flaxmeal.
  5. Add the cranberries or other dry fruit of choice & finely chopped almonds to dry mixture. Combine well.
  6. Add the date & prune mixture into the dry ingredients. Make sure to mix everything up well.
  7. If you’re adding in the maple syrup then toss it in now and combine well.
  8. Line your baking pan with parchment paper or oil it well
  9. Add the mixture to the baking pan and even it out well.
  10. Bake for 3o minutes

*Let rest until cooled off before cutting into bars*


Enjoy them! I know I do & they don’t last long at all! 🙂


Date Cranberry bars