Vegan Chocolate Peppermint Cookies

It’s been a long time guys! I’m so very sorry! Life has been busy. I’m back now and I will be sharing some of our favourite recipes with you all. I also have a video version of this recipe on my YouTube channel and I will be sure to include the link below. I know some people like to see me visually make the recipes.

I decided to start off with this cookie recipe because it’s an absolute favourite at my house! I hope you enjoy it as much as we do!

I made this recipe during the holiday season and for my 12 Days Of Christmas Videos on YouTube. It has become a staple cookie recipe that is eaten anytime of the year however.

These cookies have the perfect amount of chocolate flavour and the hint of peppermint works perfectly with it. I love how fluffy and delicious they are too! Every time I make them, they just don’t seem to make it past a couple days in this house. They just get gobbled up!

I also tried keeping them as healthy as possible. I didn’t add obnoxious amounts of sugar in them. Little by little you can decrease sugar in the diet quite easily. Before you know it, you don’t crave the over sugary treats anymore. If you are still used to very sweet desserts and snacks then you might want to increase the sugar in the recipe a touch. I actually add less sugar for myself personally but since others eat them (including teens) I decided 1/2 cup of sugar was needed. I want to please everyone. You be the judge of how much sugar you want to add.

I have used a variety of sugars for this recipe and they all work just fine. I use coconut sugar most often at my house but sometimes I use cane or brown sugar too.

I also like creating oil free recipes so I can save on a ton of calories. I replace the oil with unsweetened apple sauce in this recipe. Each tablespoon of oil is 120 calories and I won’t add all those unnecessary calories to my meals or desserts. Oil is also highly refined and extremely unhealthy. It offers no nutritional value and just helps pack on the pounds to in my opinion.

As far as the optional items in my ingredient list it’s up to you if you want to add those in or not. The cookies taste great either way. I add the chocolate chips in but rarely add the candy canes. The peppermint flavour is enough for me and my family. It does look pretty on the cookies during the holidays however.

I leave my baked cookies on a cake stand because they are gone within a day or two. I would toss them into an airtight container and pop them in the refrigerator to maintain freshness if you can’t eat them that fast. They will last up to a week in the refrigerator.

These cookies are great for taking on the go too. They hold their shape and can be added to a ziplock bag, reusable bag or small Tupperware container for travel. I love having healthy treats like this when I just need a little something while I’m on the go. I work long 12 hour shifts so having snacks like this save me when I’m getting that snack urge. It’s better than buying a calorie loaded unhealthy vegan treat. I feel satisfied with my cookies and I’m able to stick to my wellness goals.


Vegan Chocolate Peppermint Cookies

Makes 18-20 cookies

Ingredients:

Dry Ingredients:

1 1/2 cups of Flour

1 tsp. Baking Powder

1/2 cup sugar

1/2 cup of Cacao Powder

1 tsp. Flaxmeal

1/3 cup Vegan Chocolate Chips (Optional)

Crushed candy canes (Optional)

Sprinkle of Salt

Wet Ingredients:

1/2 tsp Peppermint Extract

3/4 cup unsweetened Apple Sauce

1/2 cup Plant Based Milk

3 Tbsp. Of Warm Water

Method:

1. Preheat oven to 350F

2. Add all the dry ingredients in a medium sized bowl. Combine well.

3. Next put the one tablespoon of flax in a small bowl with 3 tablespoons of warm water and give it a mix. Allow to sit and thicken for five minutes before using.

4. Add all the wet ingredients as well as the flax egg in a small bowl and mix well.

5. Transfer the wet ingredients to the dry and give it a good mix. Go ahead and add the chocolate chips and if you are using them.

6. Transfer to a lined baking sheet. Add optional, crushed candy canes on top if using.

7. Bake the cookies for 12 minutes.

8. Allowed to cool completely before transferring them to an airtight container for storage.

Enjoy! 💚


I hope you all enjoy these cookies and be sure to also visit my YouTube channel for more recipes. Thank you for the support and love here in the blog and on YouTube.

Much love to you all!

-Debbie

Instant Microwave Carrot Cake


Hey guys! Today I’m sharing the fastest little instant cake you have ever seen! It’s not only quick to make but tastes super delicious too!

We don’t always have time to be baking in the kitchen so this recipe helps for those times you need something fast! This time saving little cake is whipped up in literally no time at all! If a craving hits you do you really want to start a long process of baking a treat? Not me on most days! I can easily make this treat and be satisfied in minutes!

The recipe is also healthy and still keeps my wellness goals in mind still. I use healthy ingredients that are easy to find in pretty much anyone’s home. I love using staple ingredients because it just makes life easier. I always try creating recipes that use easy to source items that are regular everyday home pantry ingredients.

Carrots are loaded with nutritional value and they taste great! They have vitamin A (from beta Carotene), Vitamin K, Fiber, Biotin, Potassium, Vitamin B6 as well as many other nutritional benefits. Carrots are great for the skin and hair, boosts immune system, facilitates digestion and is most widely known for improving eye health. They also contain other minerals such as iron, manganese and copper. I feel great about enjoying this dessert because carrots are such power houses of nutrition!

If you wanted to jazz the carrot cake a little and extra calories are no issue then you can also add frosting on top. A yummy maple icing / frosting would work amazing on this recipe. You can add icing sugar in a small bowl with some pure maple syrup. Whisk it and add a tiny amount of plant based milk until you get a nice consistency. This will add such a nice decadent addition! If you make this dessert for a guest I would go with this added option. It will look pretty too! I would also add a sprinkle of cinnamon on top of the icing / frosting for an even prettier presentation.

I know some of you like watching a video version of the recipes so I will add my YouTube recipe video below. Thank you for the support on the channel as well. If you haven’t already Subscribed to the channel then please consider doing so for more healthy recipes!

I love having a comforting cozy warm dessert from time to time. This harsh Canadian winter is becoming too much for me. We have been hitting record cold temperatures this week. It’s just bitterly cold and depressing in general. The warming spices in this cake are a lovely treat and help tremendously. I’m really enjoying a good snuggly blanket and this warm cozy carrot cake lately. It’s becoming our go to recipe!


Instant Microwave Carrot Cake

Dry Ingredients:

1 cup Brown Rice Flour

1 tsp. Baking Powder

Wet Ingredients:

1 cup Plant Based Milk of choice

2 Tbsp. Apple Sauce

5 Tbsp. Shredded Carrot

Dash of Vanilla Extract

Spices:

Sprinkle of Cinnamon

Sprinkle of Nutmeg

Kitchen Gadgets you will need:

1 medium sized bowl

1 mixing spoon

1 small microwave safe baking dish or large wide mug

Grater (for the carrot)

* You can also add Pumpkin Pie Spice as the seasoning for this recipe *


Method:

1. Add all ingredients to a bowl and combine well.

2. Transfer to small Microwave safe baking dish or large wide Mug.

3. Place in the microwave for approximately 3 minutes & 30 seconds. Check on it at the 3 minute mark to see if you need the extra 30 seconds. Keep a close eye on the cake during the whole baking process.

4. Allow to cool off a bit because it will be very hot! You also want the cake to set nicely before digging in.

Enjoy! 💚

Health , Joy & Positive Vibes,

Debbie


Fluffy Jam Filled Cookies

I wanted to share a very easy and healthy cookie recipe with you all today! It’s super easy to make and it can be all done in one bowl! You don’t need loads of supplies and ingredients to make these tasty cookies. Anyone can whip these up! In fact my 5 year old loves to help me make them. It’s definitely an children friendly recipe.

I love having healthy go to snacks available for my family, like these cookies. Everyone is always busy but it’s super easy to pack up these cookies and hit the road. I find packing healthy cookies and treats will save me from purchasing unhealthy goodies throughout the day. If hunger strikes I like having something with me in the car or my backpack to eat. Cookies like this that are filled with real ingredients, offer nourishment and you will be that much more likely to get to your next meal. You don’t want to be starving by the time your next meal comes. Snacks like this help tremendously for me personally.

You can use any type of flour you have on hand for this recipe. I will only say that you might need to add a little more milk to the batter if necessary. If you find that it’s too dry then add a little milk slowly to the bowl and combine well. My favourite flour to use is spelt flour when I make these cookies but I also use other types when needed. It will still taste good regardless of what you decide to use. I like creating recipes that allow flexibility because everyone has to work with what they have available to them. Due to the pandemic I know many places are experiencing food shortages. Grocery stores aren’t getting their full deliveries on products. We just have to work with what is currently available to us.


Fluffy Jam Filled Cookies

Dry Ingredients:

⁃ 2 cups Spelt Flour

⁃ 1/3 cup sugar

⁃ Sprinkle of salt

⁃ 1 tsp. Baking Powder

Wet Ingredients:

⁃ 1/3 cup Unsweetened Apple Sauce

⁃ 1 tsp. Pure Vanilla extract

⁃ 1/3 – 1/2cup Plant based Milk

⁃ 1/3 cup Jam ( l used Crab Apple Jam)

Method:

1. Preheat oven to 350 F.

2. Combine all the dry ingredients in a large bowl.

3. Next combine all the wet ingredients in a medium sized bowl.

4. Add the wet ingredients into the dry and combine well.

5. Place the dough on a lined baking pan. I do golf sized balls and place an indentation in each using a small teaspoon.

6. Add a little of the jam inside each cookie.

7. Bake at 350 F for 12-14minutes.

Note: You can use one bowl to make this recipe too! Add all the dry ingredients and then toss in the wet ingredients. I add 1/3 cup of milk first and depending on the type of flour I’m using. I will go ahead and add more milk if needed.

Enjoy! 💚

I will insert my video version of this quick and easy recipe in this post. Many people find it helpful to watch them. If you haven’t already Subscribed to my channel on YouTube then please consider doing so now. I have loads of easy to make healthy recipes on there! Thanks for the support!


Healthy Guilt Free Banana Loaf that Actually Tastes Great!

Hi everyone! Hope all is well with you all. It’s still quite cold and damp in my neck of the woods. The rain and dampness has made me crave comforting baked goods so I’ve been revamping my banana bread. It’s just a cold, cold Spring!

I’ve enjoyed baking and creating lots of cozy meals lately. It’s all about the comfort meals this time of year. I have so many recipes to share with you all this year and I’m hoping to get them posted soon. I’ve been recipe testing and trying my best to create healthy versions of my favourite meals. Many of them have been a huge success but a few still need to be tweaked a tad.

I’ve recreated my original banana bread and made it as healthy as possible without sacrificing the taste of this epic treat. I’m so very happy with the result! This is the most often made treat at my house. It’s easy to make, includes staple ingredients that pretty much everyone has on hand and it’s guilt free. It’s healthy and delicious! No need to have any guilt about indulging in this banana bread. You’re fueling your body with nutritious ingredients instead of the typical store bought version that’s full of sugar and fat.

I also love using this recipe for mini muffins and mini loafs. Just bake them for a shorter period of time. I love how versatile this recipe is.

I really tried to break this recipe down to minimal ingredients so that everyone can feel like they can make it easily. It doesn’t matter what your skill level is in the kitchen either. This recipe is so easy that anyone can make it, and end up with a perfect snack. I also like to create meals that children can make as well. My son is usually my assistant in the kitchen. I want him to learn the importance of making home cooked meals and desserts. My recipes are easy enough for him to help me with and learn some skills. If you have little ones too, then you can definitely make this recipe with them!

My recipe is less calorie rich than my original version. I decided to eliminate the nuts and oil to save on calories. I realized that they were honestly unnecessary ingredients in the recipe. Any type of oil is still refined and not healthy by any means. It provides no nutritional benefits and makes baked goods very calorie rich. I know the hype right now is eat all the fat you can because it’s said to be healthy for us in our diet. The reality is, it’s not. Yes we need some fat in our diet but it really should be from the whole food source such a yummy avocado.

I will add my video version of this recipe below. I know a lot of you enjoy watching the recipe video on my YouTube channel. Thank you for the continued support on my channel. I really appreciate it. If you haven’t already Subscribed to my channel then please consider doing so if you enjoy health and wellness videos. I make healthy yet satisfying meals on my channel and provide wellness tips as well.

Ok so let’s get to the good part …

Here is probably one of my most favourite recipes that I’ve ever created! I hope you enjoy it as much as we do!


Healthy Guilt Free Banana Bread


Dry Ingredients:

2 cups of oat flour

1 cup of oats

1 teaspoon of baking powder

1/4 cup hemp hearts (optional)

2 Tbsp. Ground Flax


Optional : 1/4 – 1/3 cup Vegan Chocolate chips/chocolate chunks or cacao nibs

Wet Ingredients:

6 Tbsp. Warm Water

1 teaspoon pure vanilla extract

1/2 of a cup of plant-based milk

3 regular sized spotty bananas, mashed

1/3 of a cup of sugar. I use coconut sugar, brown sugar, or maple sugar.

* Preheat oven to 350 F *

Method:

1. In a large bowl place 2 cups of oat flour and 1 cup of oats. Next add in 1 teaspoon of baking powder and 1/3 cup sugar of choice. Combine well. Toss in the 1/4 cup of hemp hearts if you are using them in your banana loaf.

2. Add 2 tablespoons of flax meal to a small bowl with 6 tablespoons of warm water. Mix well and allow to thicken up

3. In another large bowl mash three spotty bananas well. Add in 1 teaspoon of pure vanilla extract and the 1/2 cup of plant-based milk. Mix well.

4. Add the flax egg into the wet ingredients. I use a fork to mix it well.

5. Next add the wet ingredients into the dry and combine everything very well.

6. Transfer your batter into your baking dishes or loaf pans. Bake at 350° for approximately 40 to 50 minutes.

ENJOY! 💛

Let me know if you try my recipe out in the comments below! Have a wonderful week everyone!

Health, Joy & Positive Vibes,

Pineapple Upside-Down Cake!

Happy Saturday! Fall has arrived and the weather is quickly changing in my neck of the woods. The air is crisp and it’s officially cozy warm sweater weather! The evening gets pretty darn chilly now too. I get inspiration this time of year and then I try creating some healthy seasonal recipe options. I’m all about trying to create healthy treats at home instead of buying store bought goods whenever possible.

I really like to try new recipes and creating healthy versions of some of our favourite meals. I still want to enjoy a sweet treat every once in a while but I still want to stay within my wellness goals.

The holiday season is upon us and Thanksgiving is around the corner. It’s my favourite time of year because it’s a time to reflect on all the blessings we have in our lives. I feel so grateful for the life I have created! I also love the warm and cozy dishes that come along with the fall/autumn season too. I will be making my Pineapple Upside-Down Cake this year for my family celebration. It’s comforting and delicious. It’s always a hit every time I make it!

Today I’m sharing my super yummy and easy to make Pineapple Upside-Down Cake recipe with you all. I love creating healthy versions of some classic recipes. I wanted to feel good about bringing this dessert to a family get together because it’s healthy and very delicious at the same time. I want my family to enjoy a sweet treat without loading them full of unhealthy and unpronounceable ingredients.

In order to sweeten the cake you can use a variety of options. I like using Date or Coconut sugar the best. If I can’t find it at the store I will buy whatever options are available to me. I sometimes have to buy cane sugar because nothing else is available. I just recommend you trying the best you can to find the healthiest options. Everything can’t always be perfect in life and we just have to accept that and not feel guilt around it. I also remind people that although we might personally enjoy treats with little or no sugar in it other people may not. If you decide to share baked goods with others then please add the recommended amount of sugar. I feel like compared to other recipes or store bought cakes I’ve already cut down on the sugar considerably. You want other people to really enjoy it fully! When spending time with friends and family I always try and restrict a little less in order for everyone to enjoy the meal to the fullest. Time together building memories and truly enjoying the food is most important.

I also wanted to create a recipe that included easy to find ingredients as always. You guys know I’m all about keeping things fuss free! I wanted everyone to be able to find everything they needed at any local grocery store or market. Things like canned pineapple is pretty cheap to buy and works perfectly! Fresh pineapple can sometimes be quite costly depending on where you live. I didn’t want the cost of the cake to be too high overall so I stuck with staple pantry ingredients. We don’t need to break the bank in order to create a homemade treat! A simple, homemade, healthy and comforting cake was my goal. I hope you enjoy it as much as my family and I do!


PINEAPPLE UPSIDE-DOWN CAKE

Topping Ingredients:

⁃ 1/4 cup apple sauce

⁃ 1/3 cup Brown sugar or Maple Sugar

⁃ Pineapple slices

Ingredients:

⁃ 1/2 cup Soy Milk + 2 Tbsp.

⁃ 1 tsp. Apple Cider Vinegar

⁃ 1/4 pineapple juice

⁃ 1/2 cup apple sauce

⁃ 1 tsp. Pure Vanilla extract

⁃ 1/3 – 1/2 cup sugar of choice (I use coconut or date sugar most of the time)

⁃ 1 1/2 cups flour of choice (I use brown rice or oat flour)

⁃ 1 1/2 tsp. Baking powder

⁃ 1 flax egg = 1 Tbsp. Flax meal & 3 Tbsp. Water. Combine, set aside and allow to thicken.


Method:

1. Preheat oven to 350°F

2. Make the topping and add to the bottom of a 9 inch round baking pan. Arrange pineapple slices around the pan as well.

3. Next you’re going to make your flax egg. Add 1 tablespoon of flaxseed meal into a small bowl and 3 tablespoons of warm water. Combine well and set aside to thicken up.

4. Next add the milk,apple cider, pure vanilla extract, sugar and applesauce. Mix well.

5. Next add the flax egg to the wet ingredients and combine it well.

6. Now in a large bowl combine all your dry ingredients be sure to mix it well.

7. Transfer all the dry ingredients into the wet ingredients and combine all the ingredients.

8. Pour over the pineapple rings in the pan evenly distribute the batter out.

9. Bake for 35 to 40 minutes in a 350°F oven.

10. Once it’s baked allowed to completely cool before transferring to a plate or serving dish. Once it’s cooled you can place a plate on top of the pan and flip it over. The cake should slide out easily if you have a nonstick pan if not you may have to pre-oil your pan in order to ensure the cake can be removed easily.

Enjoy! 💚


I will include the video version of this yummy cake! If you haven’t already Subscribed to my YouTube channel then please consider doing so now. That way you don’t miss any upcoming cozy & comforting recipes upcoming! Thank you for the support and love on the channel!


Best Ever Oatmeal Chocolate Chip Cookies

My most popular homemade cookie is my Oatmeal Chocolate Chip cookie recipe. It’s healthy, nutritious and keeps you feeling full super long. They even qualify as a great breakfast cookie in my opinion. I say if they include oatmeal then they qualify as breakfast!

This recipe can also be altered to suit your preferences. You can mix it up a little by replacing the chocolate chips with raisins or cranberries if you prefer. Those options would be tasty. My kids like them best with vegan chocolate chips, so I stick with this option pretty much every time I make it.

I feel good knowing that although I’m eating a cookie that it’s a healthy alternative. I love guilt free options!

I will indulge in store bought baked goods sometimes but they just don’t seem to settle with me well. These treats are usually too sweet and contain oil in them. I’m not used to either of those things in my diet. I now avoid outside treats as much as possible and try making my own healthy snacks.

If you don’t like bananas then I apologize because the star of the show is banana in my recipe. It binds everything so nicely and provides all the sweetness we need without adding any extra sugar. I avoid adding extra sugar in my baked goods whenever possible. You can use sweet potato as an alternative to banana however and that should work really well too.

BEST EVER OATMEAL CHOCOLATE CHIP COOKIES

• 2 cups oats
• 4 cups oat flour
• 9 bananas
• 1 1/2 tsp vanilla
• 1/2 cup vegan chocolate chips
• 1/4 cup hemp hearts
• 6 flax eggs.

FLAX EGGS: 1Tbsp. Flaxmeal + 3 Tbsp. Water. This will make 1 Flax Egg. Allow to thicken up for 5 minutes.

Preheat Oven to 350 F. & Make your Flax Eggs

1. Mash Bananas and add Vanilla

2. Add in the thickened Flax Eggs and mix with a fork
3. Toss in the Oats and combine well
4. Next add in the Oat Flour

5. Add in the Hemp Hearts & Vegan Chocolate Chips
5. Combine Well
6. Place parchment paper on a cookie sheet and shape the cookies out with a spoon. Flatten them as well.
7. Bake for 18 Minutes at 350 F

ENJOY!


Bake at 350° for 18 minutes. Allow to cool completely before storing in an airtight container.

My simple Guilt Free Cookies!

I hope you enjoy my recipe as much as we do at my house! Healthy foods can taste exceptionally good when you use the right ingredient combinations. These cookies make me feel like I’m eating a decadent treat but in reality it’s just a wholesome snack.

Stay Healthy my friends! Much Love & Positive Vibes to you. 💚

Healthy Holiday Applesauce Muffins!

Hi everyone! I hope the holidays haven’t burnt you out yet and your still thriving. This time of year has many if us feeling depleted. It’s the shopping, events, decorating, cooking, entertaining and it gets so tiresome.

We also tend to over indulge in goodies and other foods this time of year. We all do it no matter how healthy we are. It’s also a very social time of year with all the gatherings. I think we should enjoy dessert and good food with loved ones. After all we don’t see them all the time.

I do find that in order for me to stay on track with my health goals however that I need that back up treat that’s legit healthy though. It’s gotta taste great but still be healthy. I know I’m asking for a lot here but it’s possible. I need that balance so keeping the healthy treat around the house makes me feel better. I’ll reserve my super indulgent holiday eating for when I’m out with family & friends.

The day I came across Dr. Neil Bernard’s recipe was probably one of the best days ever! It was an old recipe from a weightloss book that he wrote long ago. I only picked it up at a thrift shop because it was written by him and he is all about the oil free cooking too. I practically did the happy dance when I came across it. Yes I still modified the original recipe but the bones of the recipe remained the same. For that I’m thankful to him!

It’s such a simple recipe and it uses only a handful of ingredients. Again I can say “thank you Dr. Bernard!” Simple recipes using few ingredients are my way of life! I’m a mom of five and I don’t have extra time! I work 12 hour shifts in a hospital so again this girl has no extra time to spare! Anything that makes my life easier I’m down for.

I’ve tried this Applesauce recipe with and without raisins and it works out great both ways. My 10 year old is obsessed with these muffins and likes the raisins in them. I tend to make them without raisins for myself because I try and limit my dry fruit consumption.

I’m gonna link a video of me making the Muffins below for you. I also added the complete recipe and instructions in the video description box.

Thanks so much for stopping by my blog and checking out my video. If your not already Subscribed to my blog and YouTube channel please do so! I have more upcoming quick and healthy recipe videos coming up in the new year! I appreciate your support and love.

Please share this post or video with whoever you feel would enjoy it. If you know anyone who is on a weighloss journey this might be helpful. We all need a treat and this one is made with whole foods and natural ingredients. Simple & nutritious recipes can still taste great!

Happy Holidays everyone!

Health, Joy & Positive Vibes,

Debbie

~VeganMommyDee

Healthy Carrot Pulp Loaf

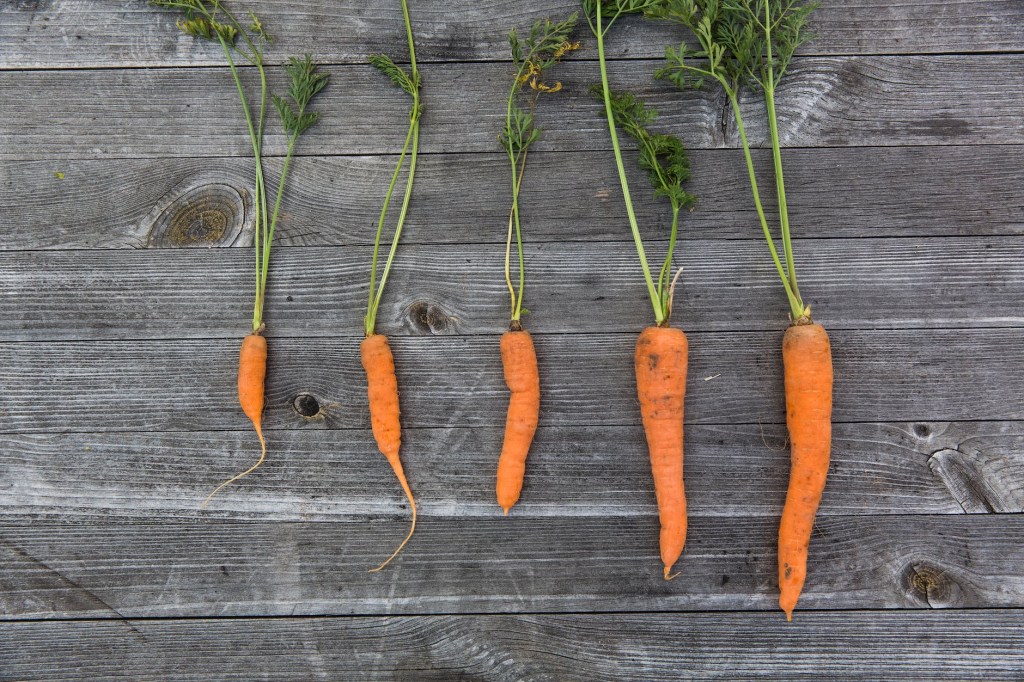
Have you ever thought to yourself “what a waste” after discarding your juicing pulp? I kept thinking that every time I tossed my pulp in the compost bin after juicing. I juice almost everyday so that’s a fair bit of pulp! I wanted to figure out some ways of using up that pulp. I’ve made a few things that worked fantastic and a few that were total flops. Somethings are a work in progress and that’s fine with me. Eventually I’ll get it right and I feel like I’m learning a lot throughout the process.

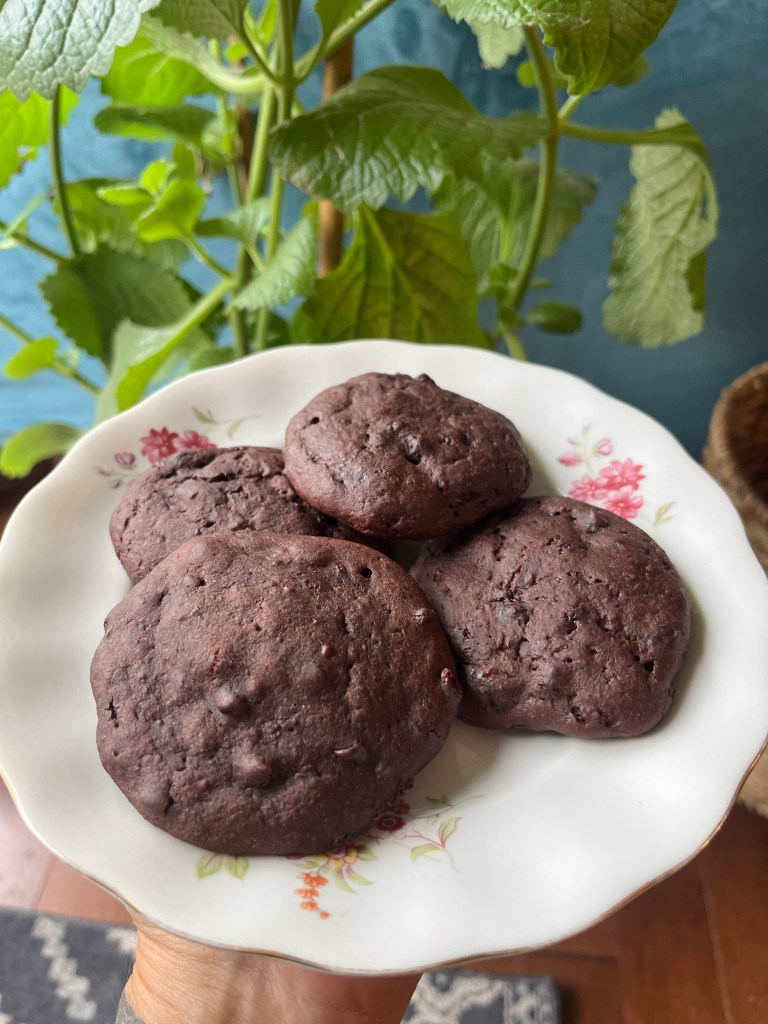
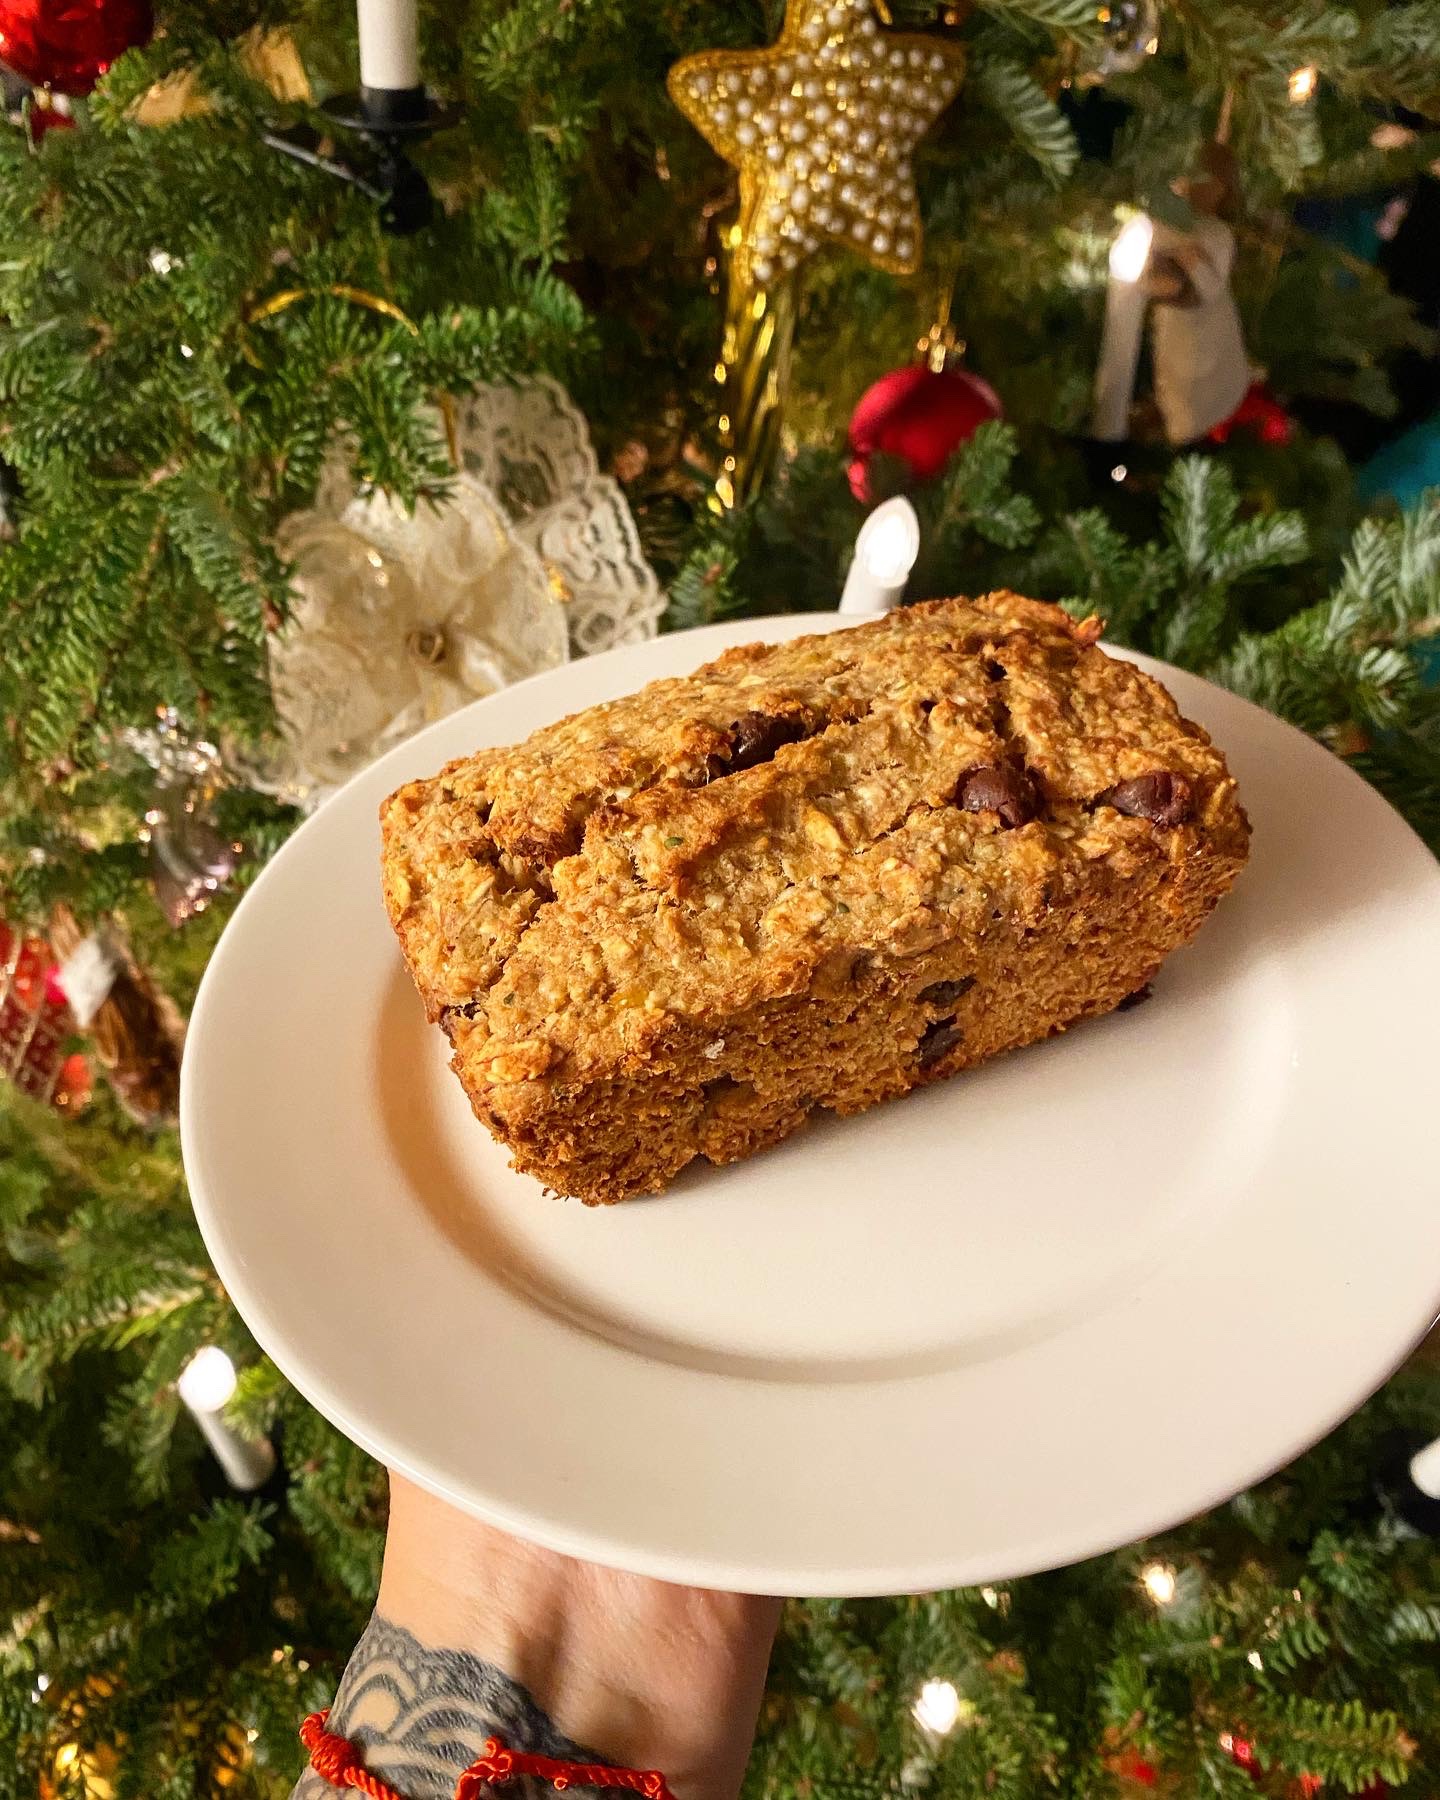
I wanted to share my healthy carrot pulp loaf with you all in hopes that you find it useful. I tried making this loaf a few times in different ways just to test out what worked better. We love to top a slice of this yummy loaf with some butter and gobble it up! You can totally make muffins with my recipe too if you prefer. I make muffins often and add some vegan mini chocolate chips to them. I use my ceramic muffin tin and that way I done have to use the paper muffin cups! I’m happy because it’s great for the environment, saves me money and saves my muffins from ending up into a crumbly mess. I bake mine for about 18 minutes but as every oven may vary a bit keep an eye on them. You may need to increase or decrease the time depending on your oven.

Now if only I could find a good ceramic loaf pan! I’m on the hunt for one. Let me know if you’ve bought one and what brand it is below in the comments. Thanks!

My followers across my social media showed interest in my recipe but I was still recipe testing. After trying it a few times and adding new ingredients to my loaf I’m finally happy with the outcome. So as promised, here is the recipe below. Enjoy!

For those of you that don’t juice don’t fret because you can totally make this recipe with grated carrots! Now go rock this recipe! Tag me in pictures of your awesome loaf or muffins. 😀

Things you will need

*Large mixing bowls

* 1 wooden spoon (or use your favourite baking spoon)

* 1 loaf pan (use whatever size you prefer for bigger or smaller slices) I prefer a smaller loaf pan myself

* Set of measuring cups and spoons

* Fork

Dry Ingredients

Cups flour of choice (I use brown rice flour a lot)

* 3/4 cup coconut sugar

* 1 1/2 tsp baking soda

* 1 1/2 tsp baking powder

* 1/3 cup hemp hearts

* 1/2 cup GF Oats

* 2 tbsp chia seeds

* 1 tbsp cinnamon

* 4 tbsp flax meal in order to make 4 Flax Eggs

* Pinch of salt

Wet Ingredients

*3/4 cup non dairy milk ( I like using almond or coconut milk)

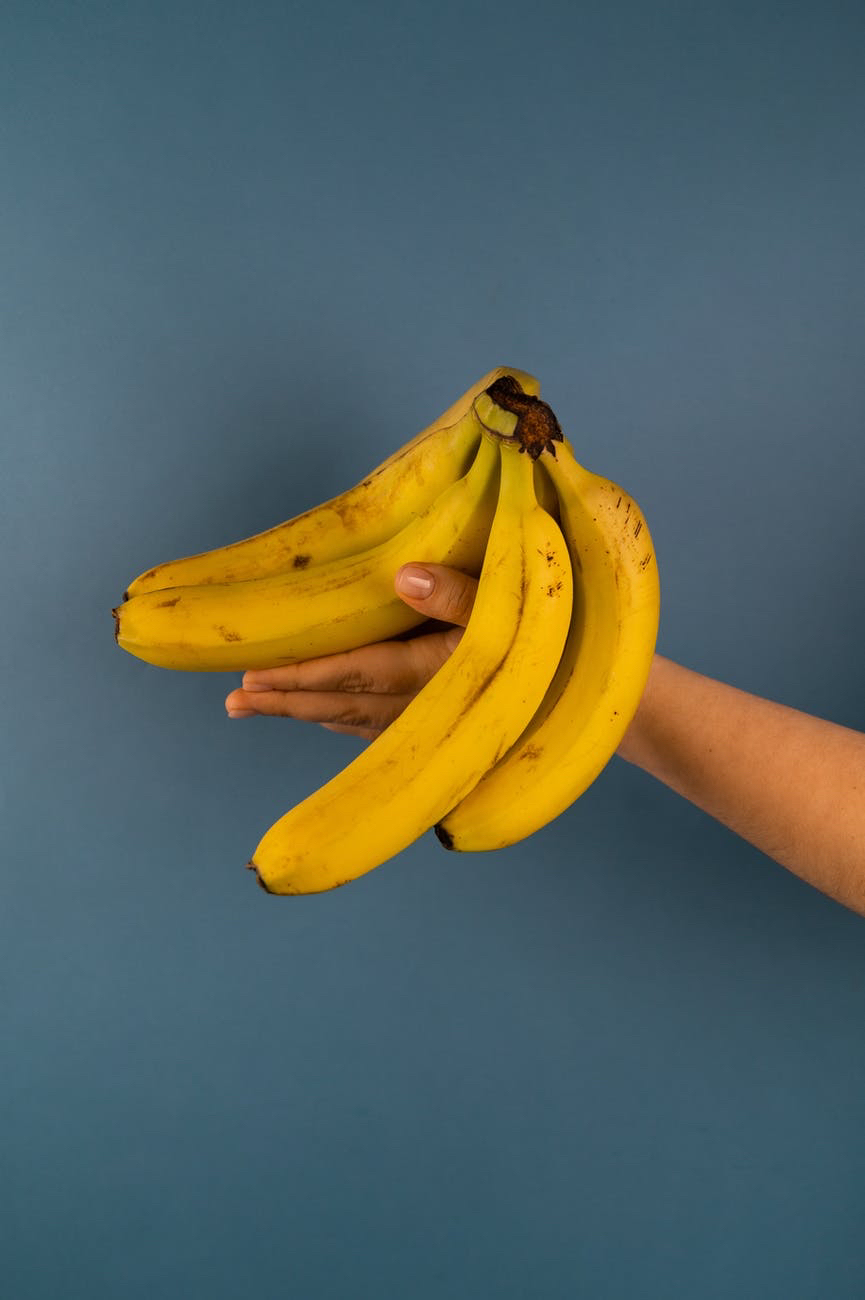
* 1 large banana (mashed)

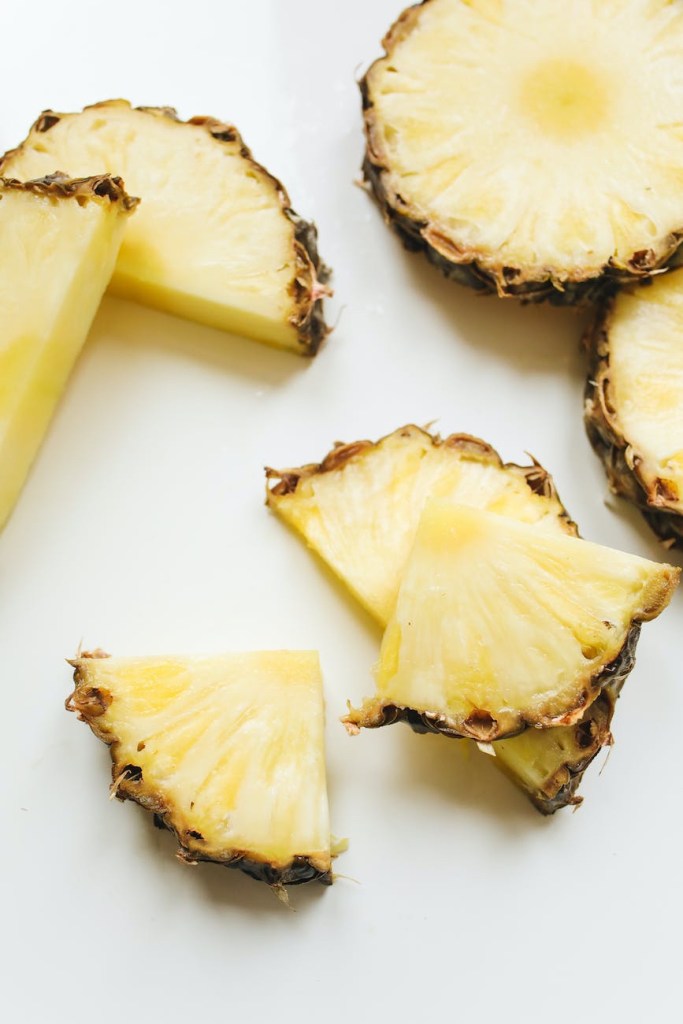
* 1 1/2 packed cups of carrot pulp from your juicer

* 1/2 cup unsweetened apple sauce

* 1/4 cup coconut oil

* 12 tbsp of water to add to the flax meal

  • Walnuts for topping (Optional)
  • To make 1 Flax Egg mix 1 tbsp flax meal with 3 tbsp of water and mix well. Allow to thicken for 3-5 minutes. In order to make this loaf you will need 4 flax eggs.

1. Preheat your oven to 375 F

2. Add your ground flax to a small bowl with water. Mix well and allow to sit for 3-5 minutes. The mixture will thicken up so you can use as an egg replacement.

3. Mix all the dry ingredients together in a large bowl.

4. Add all the wet ingredients to another large bowl and combine well

5. Add the flax eggs into the wet mixture and mix well using a fork

6. Transfer the wet ingredients into the dry and combine well

7. Line loaf pan with parchment paper

8. Add the mixture into the loaf pan and even it all out. Top with walnuts if your using them

9. Pop them into the oven and bake for 60 minutes

10. Check if your loaf is done by inserting a wooden scuwer into it or a tooth pick

11. Remove from oven and allow to completely cool before trying to slice it.

Note:

  • Cooking time may vary depending on the oven. Check your loaf at the 50 minute mark and decide if it needs more time like mine does.
  • If you feel like the top of your loaf is browning up too much then just cover it with foil and continue to bake it. I try avoiding foil and enjoy nicely toasted walnuts on top of my loaf. I’ve also moved my oven rack to a lower position which is a great alternative if I feel I need to.
  • I actually add more cinnamon to my loaf because I absolutely love the way it makes baked goods taste. I also think it helps add great flavour without adding more sugar to recipes.
  • I feel that 3/4 cup of coconut sugar is enough to sweeten this loaf but if your preference is sweeter loafs or desserts then I would say add more sugar to the recipe as desired.

I hope you enjoy this recipe as much as my family and I do!<

Saint Patrick’s Day Protein Balls!

Happy-St-Patricks-Day

Happy Saint Patrick’s Day!!!


Hi everyone, hope your having a great day! Things have been busy here in my neck of the woods, as life with five kids is always busy. Between swim class, girl guides, appointments, my kids social lives and everything else it gets quite busy. Not to mention doing all that with a 9 month old so everything takes a little longer to accomplish lol. I try posting on IG most often out of all my social media but I don’t to post on here as much as I would like unfortunately.

A lot of people have asked me for my protein ball recipe so I thought I should post it for everyone to enjoy. I decided to post my recipe for these super healthy and protein packed St. Patty’s Day protein balls since it’s coming up this Friday! We’re  actually having a St Patty’s Day party at our house this year since I’m home and not working this year (I’m on Maternity Leave). I just added more Spirulina to my protein ball mixture to achieve this wonderful green colour so they look a little more festive. No added unhealthy dyes in these babies! By doing this I also made them a power house of nutrition. I have to say I just love how easy they are to whip up and the ingredients used are all staple ingredients in my home. These protein balls are protein packed with hemp hearts, vegan protein powder, and spirulina! Healthy fats are thrown in there too with yummy unsweetened creamy peanut butter! You can use whatever nut butter you have at home or prefer and they will still turn out amazing.

These protein balls are perfect for taking with you on the run for healthy snacking while doing errands. They will stop you from stopping for unhealthy fast food because they are quite filling and will hold you over until your next balanced meal.  I love the fact that they’re also a great  snack to take with you to the gym for a post workout snack. I store mine in the fridge in an air tight container for over a week but usually they don’t even last that long!

Here’s the super easy recipe for these tasty and healthy protein ball snacks.


St. Patrick’s Day Protein Balls


Ingredients:

  • 1 tbsp. Spirulina
  • 1 cup oat flour
  • 1 cup unsweetened peanut butter
  • 2 scoops of vegan protein powder
  • 1 heaping tbsp. of hemp hearts
  • 1/3 cup unsweetened almond or coconut milk
  • 2 – 3 tbsp. of pure maple syrup


Tools:

  • A medium sized glass or ceramic bowl
  • Fork
  • Storing container with an air tight lid

Method:

  1. Combine the oat flour with the vegan protein powder in your bowl
  2. Add the peanut butter and maple syrup
  3. using your fork combine ingredients and get the peanut butter well mixed in. The mixture with look quite crumbly.
  4. Next add the almond or coconut milk and continue to mix all the ingredients well.
  5. Form balls with the mixture and place inside an air tight container.


March 2017 104

Note:

* The protein balls pictured above have less spirulina. I prefer to add a whole tbsp. but depending on who I’m serving them to I may add less. These have 1 tsp. in the mixture.

*You can add optional vegan chocolate chips or shredded coconut to your mixture too if desired as well.


Enjoy!

november-2016-183


Raw Vegan PB Cheesecake love!

VeganMommyDee's Raw Vegan PB Cheesecake

VeganMommyDee’s Raw Vegan PB Cheesecake


I made one of my favourite cheesecakes earlier this week … raw vegan peanut butter cheesecake! Anyone who knows me well knows that I’m a PB and over all nut freak. PB makes everything perfect! This was my 1st try making this cheesecake and I’m really happy with the outcome. So happy indeed that I’m sharing my recipe with you all right away. I’ve had many people ask me for this recipe once I posted a picture of it on Instagram. My new years resolution was to try and put pen to paper and actually write down my recipes so I did just that when I made this cheesecake. I’m not a fussy person and I love to bake and cook so I’ve become the queen at winging my recipes. I barely measure and don’t fuss about exact measurements. When people ask me for recipes, ask me to please consider writing a cookbook or teach cooking classes this becomes a problem however. I blame the way I am because of my mom (just joking) because she never used measurements when I used to cook/bake with her as a child. She intern leaned the a little of this and a bit of that type of measuring from her mother as well. I’m breaking the cycle now and these days I’ve made a conscious effort to try and write down the measurements that I’m using when I’m cooking or baking. So going back to this awesome raw cheesecake I didn’t overly sweeten mine so if your a major sweet tooth then add more sugar to your cheesecake. I’m a sweet tooth who has converted to an almost sugar free lifestyle so I try and limit how sweet I make my desserts. It’s really difficult sometimes but I just try and use dates and stevia when baking in order to make my desserts as healthy has possible. I love the natural sweetness that dates bring to desserts and what’s even better is they have many nutritional benefits. Hooray!


Here is my very simple recipe …


Raw Vegan Peanut Butter Cheesecake


You will need:

  • 1 spring form pan ( I use a 9″ pan )
  • 1/3 cup Pure organic coconut oil
  • 1  400 ml can of coconut milk ( you will only use 1/2 of the can however)
  • 5 cups Raw cashew halves
  • 1 TBSP Maple syrup
  • 2 cups Medjool dates
  • 3 Powdered Stevia packets
  • 1/3 cup vegan mini chocolate chips
  • 1 1/2 cup Unsweetened natural peanut butter
  • Food processor


Method:

  1. The 1st step which is the most important step of all is soak your cashews for at least 4 hours before making this recipe. I prefer to soak mine overnight. I just put the cashews in a glass bowl and cover them with fresh water the night before I’m making any cheesecake.
  2. Soak your dates in very warm water for 10 – 15  minutes so they can soften and become really plump. I also pop the can of coconut milk into the fridge while my dates soak. I find when the can is cold the cream becomes a little thicker and easier to scoop up after.
  3. You are going to start off with making the crust for the cheesecake by adding 2 cups of the raw cashews into the food processor with 7 pitted dates. Process until the dates have been incorporated well.
  4. Lightly oil your spring form pan with a little coconut oil
  5. Transfer the crust mixture into the spring form pan and press down well and evenly distribute it around the base of your pan.
  6. Now you can go ahead and make your filling by adding the following ingredients into the food  processor:                                                                                                                                                                                                              The remaining 3 cups of the the raw cashews, 1 TBSP of maple syrup, 1/3 cup coconut oil, 3 packets of stevia,  1  1/2 cup peanut butter, 1/2 of the can of coconut oil (skim the thickening coconut cream from on top as you don’t want the liquid for this recipe) and the remaining pitted dates. Process very well. Make sure to scrape down the processor’s bowl in order to make sure everything is combining well.
  7. Once combined well and it’s a nice creamy consistency then add your filling into the spring form pan and smooth it out evenly.
  8. Top with mini vegan chocolate chips
  9. Pop it into the freezer to set for at least 4 hours so the cheesecake can set nicely.
  10. Remove it from the freezer about 20-30 minutes before your want to slice it up and serve it. You can keep any left over slices in the fridge in an air tight container.

So incredibly easy to make right? The only thing you have to remember to do is soak your nuts and your dates so that your cheesecake turns out wickedly good! 🙂

Enjoy!

~Debbie~

*Remember to visit me on Instagram and take a look at how I try and live a healthy balanced lifestyle! I’m VeganMommyDee on there as well.*


A lovely slice of VeganMommyDee's Raw Vegan PB Cheesecake!

A lovely slice of VeganMommyDee’s Raw Vegan PB Cheesecake!