Smoothie Bowl Breakfast

fall-2016-390


Life is busy but there is always time to whip up a yummy smoothie bowl! All you need is fruit, milk, and healthy toppings. Super easy. I just add whatever frozen fruit I have in my freezer. We always have frozen bananas and blueberries so those appear in my smoothie bowls quite often. I also always add Spirulina to my smoothies as well for added health benefits.

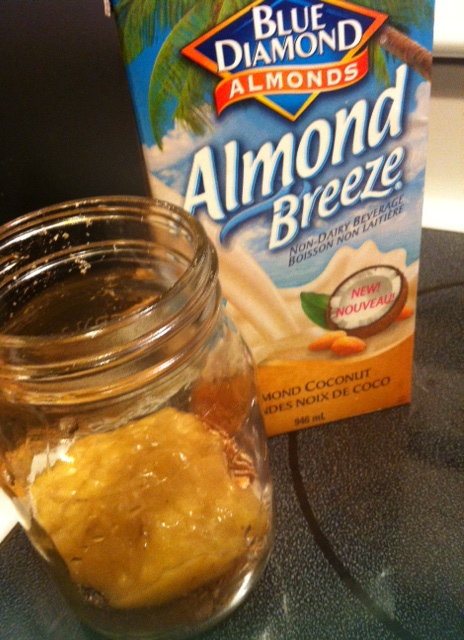
 Just blend or process them with a splash of non dairy milk and you have an instant nutritious breakfast. As far as toppings go my favourites are pumpkin seeds, chia seeds, sliced almonds, homemade granola, shredded coconut, hemp hearts and fresh sliced fruit. If your on the go with your smoothie then pop it into a mason jar with your toppings for easy travel!

 There isn’t really a “recipe” for this but since people keep asking me what I put in my smoothies I said I’d post a couple for them to reference. The great thing about a smoothie is that you don’t need a recipe to dictate what you should or shouldn’t put in it. You just throw in what you enjoy and add the ingredients you have at home hiding in the freezer.

 Have fun experimenting with your yummy fruit choices and playing around with different toppings!


Blueberry Bliss Smoothie Bowl

  • 2 cups organic blueberries
  • 1 frozen organic banana
  • 1 Tbsp. Spirulina
  • Splash of unsweetened non dairy milk (my favourites are almond or coconut)

Blend or process ingredients. Pour it in your favouite bowl and add your awesome healthy toppings! Below are my suggestions. It can’t get any easier than that right?!

  • 1/4 – 1/3 cup Pumpkin seeds
  • 1 tsp. of chia seeds
  • 1 Tbsp. of Sliced almonds


Tropical Goodness Smoothie

  • 1  organic frozen banana
  • 2 cups pre packaged frozen pineapple, mango & coconut blend from your grocery store
  • 1 Tbsp. Spirulina

Blend all the ingredients up and top with your desired toppings.

Suggested toppings:

  • 1 Tbsp. of Hemp hearts
  • 1 Tbsp. shredded coconut
  • Sprinkle of homemade granola
  • Banana slices


Enjoy your breakfast smoothie bowls! Your body will thank you for the healthy fuel you are giving it! 💕

~Debbie~


Raw Vegan PB Cheesecake love!

VeganMommyDee's Raw Vegan PB Cheesecake

VeganMommyDee’s Raw Vegan PB Cheesecake


I made one of my favourite cheesecakes earlier this week … raw vegan peanut butter cheesecake! Anyone who knows me well knows that I’m a PB and over all nut freak. PB makes everything perfect! This was my 1st try making this cheesecake and I’m really happy with the outcome. So happy indeed that I’m sharing my recipe with you all right away. I’ve had many people ask me for this recipe once I posted a picture of it on Instagram. My new years resolution was to try and put pen to paper and actually write down my recipes so I did just that when I made this cheesecake. I’m not a fussy person and I love to bake and cook so I’ve become the queen at winging my recipes. I barely measure and don’t fuss about exact measurements. When people ask me for recipes, ask me to please consider writing a cookbook or teach cooking classes this becomes a problem however. I blame the way I am because of my mom (just joking) because she never used measurements when I used to cook/bake with her as a child. She intern leaned the a little of this and a bit of that type of measuring from her mother as well. I’m breaking the cycle now and these days I’ve made a conscious effort to try and write down the measurements that I’m using when I’m cooking or baking. So going back to this awesome raw cheesecake I didn’t overly sweeten mine so if your a major sweet tooth then add more sugar to your cheesecake. I’m a sweet tooth who has converted to an almost sugar free lifestyle so I try and limit how sweet I make my desserts. It’s really difficult sometimes but I just try and use dates and stevia when baking in order to make my desserts as healthy has possible. I love the natural sweetness that dates bring to desserts and what’s even better is they have many nutritional benefits. Hooray!


Here is my very simple recipe …


Raw Vegan Peanut Butter Cheesecake


You will need:

  • 1 spring form pan ( I use a 9″ pan )
  • 1/3 cup Pure organic coconut oil
  • 1  400 ml can of coconut milk ( you will only use 1/2 of the can however)
  • 5 cups Raw cashew halves
  • 1 TBSP Maple syrup
  • 2 cups Medjool dates
  • 3 Powdered Stevia packets
  • 1/3 cup vegan mini chocolate chips
  • 1 1/2 cup Unsweetened natural peanut butter
  • Food processor


Method:

  1. The 1st step which is the most important step of all is soak your cashews for at least 4 hours before making this recipe. I prefer to soak mine overnight. I just put the cashews in a glass bowl and cover them with fresh water the night before I’m making any cheesecake.
  2. Soak your dates in very warm water for 10 – 15  minutes so they can soften and become really plump. I also pop the can of coconut milk into the fridge while my dates soak. I find when the can is cold the cream becomes a little thicker and easier to scoop up after.
  3. You are going to start off with making the crust for the cheesecake by adding 2 cups of the raw cashews into the food processor with 7 pitted dates. Process until the dates have been incorporated well.
  4. Lightly oil your spring form pan with a little coconut oil
  5. Transfer the crust mixture into the spring form pan and press down well and evenly distribute it around the base of your pan.
  6. Now you can go ahead and make your filling by adding the following ingredients into the food  processor:                                                                                                                                                                                                              The remaining 3 cups of the the raw cashews, 1 TBSP of maple syrup, 1/3 cup coconut oil, 3 packets of stevia,  1  1/2 cup peanut butter, 1/2 of the can of coconut oil (skim the thickening coconut cream from on top as you don’t want the liquid for this recipe) and the remaining pitted dates. Process very well. Make sure to scrape down the processor’s bowl in order to make sure everything is combining well.
  7. Once combined well and it’s a nice creamy consistency then add your filling into the spring form pan and smooth it out evenly.
  8. Top with mini vegan chocolate chips
  9. Pop it into the freezer to set for at least 4 hours so the cheesecake can set nicely.
  10. Remove it from the freezer about 20-30 minutes before your want to slice it up and serve it. You can keep any left over slices in the fridge in an air tight container.

So incredibly easy to make right? The only thing you have to remember to do is soak your nuts and your dates so that your cheesecake turns out wickedly good! 🙂

Enjoy!

~Debbie~

*Remember to visit me on Instagram and take a look at how I try and live a healthy balanced lifestyle! I’m VeganMommyDee on there as well.*


A lovely slice of VeganMommyDee's Raw Vegan PB Cheesecake!

A lovely slice of VeganMommyDee’s Raw Vegan PB Cheesecake!


Pancake Tuesday!

It's Shrove Tuesday / Pancake Tuesday today!

It’s Shrove Tuesday / Pancake Tuesday today!


It’s Pancake Tuesday, Shrove Tuesday or Fat Tuesday … whatever ya wanna call it it’s fine by me! If you’re not familiar with it then just click on Shrove Tuesday & Fat Tuesday and the links will fill you in. As per tradition I made pancakes for my kids to enjoy this morning. I put together some super fast and easy pancakes while packing school lunches and getting my crew out the door on time. I made super Cinnamon vegan pancakes and Cinnamon & Blueberry pancakes as per my 9 year old’s request. When I’m in a big hurry (like today) I use a premixed flour pancake mix sometimes which contains healthy whole grains like brown rice, teff, spelt and quinoa flour. I like having a bag of the premixed flour handy but they sometimes contain sugar and I prefer sugar-free options. To sweeten my pancakes I’ve only been using sugar-free powder stevia and I love the results! I find the liquid stevia way too bitter in taste however so I stick to the powder form. That way the only sugar we are actually putting on our pancakes is the 100% natural Canadian maple syrup and the natural sweetness from the berries. I sometimes skip the maple syrup and just add a touch of pure organic coconut oil on top as an even healthier alternative … yea bring on the yummy good fats! Below is the in a rush on a school day recipe I used this morning 🙂


CINNAMON / BLUEBERRY CINNAMON PANCAKES


Ingredients:

  • 1 cup of your favourite flour mix
  • 1 tsp. aluminum free Baking Powder
  • 1/4 cup filtered water
  • 1/3 -1/2 cup unsweetened almond milk
  • 1 melted tbsp. of coconut oil
  • 3 packets of stevia
  • 3 tbsp. flaxmeal mixed with 9 tbsp. of water, let sit for a couple of minutes to thicken up
  • 1 tbsp. cinnamon, or to taste
  • 1 pint of blueberries, I usually save some for garnish on top
  • You will also need vegan butter or coconut to coat your pan for cooking


Method:

  1. Mix your flaxmeal with water and let it sit.
  2. In a medium-sized bowl add the flour, baking powder, cinnamon, and stevia. Mix well.
  3. Heat a frying pan with a vegan butter or coconut oil
  4. In a small bowl add the water, milk and the coconut oil and mix well. When adding the milk add in 1/3 cup and you can add more if needed afterward.
  5. Add the wet ingredients into the dry. Add in extra milk if you find your batter is too dry. Also add in the flaxmeal as well and combine. Don’t over mix however or your pancakes wont be as fluffy.
  6. Transfer the pancake mix to your preheated frying pan or griddle. They cook up fast so keep an eye on them.


NOTE:

  • As far as the blueberries go I usually add them in to my batter once I’ve made some plain cinnamon ones as some of my kids prefer them without the blueberries. Then I gently add the blueberries into the batter and cook up the rest.


*This recipe makes about 6 good-sized pancakes so I normally double it.*


Enjoy! 🙂

Healthy Cinnamon Apple Chips!


Healthy Apple Chips!

Healthy Apple Chips!


I love making healthy apple chips! They are a guilt free snack or treat and they are so easy to make! I have found that the best way to slice the apples is by using a mandolin so that they are super thin. If you don’t have a mandolin don’t sweat it, you can just slice them as thin as possible. The thinner they are the faster they will cook. If you use a knife to cut the apple slices just remember to allow some extra time for cooking so they turn out perfect. I like to sprinkle cinnamon op top of my slices but if you’re not a cinnamon fan then just don’t use it. I love cinnamon because of the wonderful flavor it adds but it also helps reduce inflammation in the body.


Apple Chips

Ingredients/things you will need:

  • 1 large baking sheet or 2 smaller ones
  • 1 tbsp. Coconut oil
  • Cinnamon
  • Apples (I use 4-5 organic Gala apples)
  • 1 tbsp. Lemon juice
  • Mandolin or sharp knife
  • Parchment paper
  • Silicone brush


Apple Slices!

Apple Slices!


Method:

  1. Preheat oven to 250 F
  2. I usually use 4-5 Organic Gala Apples when I make apple chips. I use the mandolin to slice them up thinly. Place in a medium-sized bowl.
  3. Squeeze 1 tbsp. of lemon juice on top of the apple slices and give them a careful toss. If you mix them too much they will fall apart so be gentle!
  4. Melt 1 tbsp. of coconut oil
  5. Line 1 large baking sheet or 2 smaller baking sheets with parchment paper.
  6. Add the apple slices to the baking sheet. Try not over lapping them and lay them out in one single layer.
  7. Using your silicone brush you can now lightly brush the apple slices with coconut oil and sprinkle them with cinnamon.
  8. Pop them into the oven for about 45 minutes.
  9. Just continue this process until you have baked all your apple slices.
  10. Allow to cool off once cooked and ENJOY! 🙂

* Visit me on Instagram for more healthy food ideas! My handle is  VeganMommyDee *   🙂

Chocolate Muffins with Mini Chocolate Chips!

Chocolate Muffins

My kids are really picky and I’ve made many chocolate muffins but this is the favourite in my house! So now that I created a recipe that’s finally a hit with everyone I’m sticking to it! No more playing around with ingredients anymore when it comes to chocolate muffins/cupcakes in my house! LOL These muffins are really fast to make and have very simple ingredients. Sometimes the simpler recipes create the best outcome!

I want to mention that depending on the flour that you choose to use you may need to use a little more milk in the recipe. If you find it a little too dry then add 1 tbsp. more milk at a time. I tried to cut the sugar down in my recipe but that didn’t work out so well with my taste testing crew over here. Ugh! So it’s best to use 1/2 cup for best results. In order to make myself feel better I only add a few mini chocolate chips on top of each muffin instead of adding them into the batter. I cut down on sugar in that sense and the kids didn’t notice. Hey sometimes you have to be a little sneaky if it’s for their best interest right? 🙂

Here is my super easy and kid approved recipe …

CHOCOLATE MUFFINS WITH MINI CHIPS

* Makes 12 Muffins*

Ingredients:

  • 1 1/2 cups flour, I usually use brown rice flour or spelt flour. I’ve also used a mix of regular unbleached flour and brown rice flour and it worked really well.
  • 2 tsp. baking powder
  • 1/3 cup veggie or coconut oil
  • 1/4 cup cocoa powder, you can add more if you like a stronger chocolate taste.
  • 1/2 tsp. pure vanilla extract
  • 3 tbsp. flaxmeal
  • 6 tbsp. water
  • 1 cup unsweetened almond milk. Depending on the type of flour you use you may need up to 1/4 cup extra as some flours draw in the moisture more than others.
  • 1/2 cup coconut sugar
  • Handful of vegan mini chocolate chips

You will need:

  • 3 mixing bowls: 1 large, 1 medium & 1 small
  • 1  muffin tin (for 12 muffins)
  • 12 paper muffin liners

Method:

  1. Preheat oven to 400 F
  2. Add your flaxmeal to a small bowl and add 6 tbsp. of water to it. Mix and set aside for a few minutes until it thickens up a bit.
  3. Line your muffin tin with paper liners.
  4. Add flour, baking powder, cocoa and sugar into the large bowl and combine well.
  5. In your medium-sized bowl add milk, oil, vanilla and flaxmeal mixture. Mix well.
  6. Add your wet ingredients into your dry ingredients and combine. Don’t over mix. Add in a little extra milk if needed.
  7. Scoop up the batter and fill up your muffin tin.
  8. Top each muffin with some vegan chocolate chips.
  9. Pop them into the oven for 20 minutes.
  • Once baked allow to cool off in the muffin tin. Transfer to an air tight container.

* If you wanted to make cupcakes with this recipe then just add the mini chips to the batter instead. Once baked allow them to cool off completely and then ice them. Place them in the fridge for a bit to allow your icing to set nicely*

Enjoy! 🙂

muffins

My Raw Vegan Pumpkin Pie!

I’m finally posting the recipe for my Raw Vegan Pumpkin Pie !!! Many people have asked me for this recipe so here it is! It’s super easy to make and so far everyone who has tried it has loved it! When I cook and bake I pretty much always just eyeball the quantities of my ingredients. Not good when your being asked for your recipes often! I’ve now forced myself to pay attention to the quantities and write down my recipes as I go. This recipe is easily adapted so adjust the spice amounts as desired. Everyone is different. Some people like their pie mild in flavor and others like it strong. I’m kinda of a mid range person and that’s what my recipe reflects. As far as nuts go I prefer to use raw cashew halves in my pie filling as well as the crust. I’ve done it with walnuts and it turns out good in flavor but I find the texture of the pie is much better when I use cashews. So although Thanksgiving has already passed for us in Canada I still made another raw pumpkin pie this week. Hey it’s still fall so I think it’s still appropriate! For my lovely American friends & family this recipe is coming to you in perfect timing! Your welcome! 🙂


My Raw Vegan Pumpkin Pie


RAW VEGAN PUMPKIN PIE


Ingredients for the crust:

  • 1 cup raw cashew halves (no need to soak the nuts for the crust)
  • 1 tbsp. unsweetened shredded coconut
  • 2 medjool dates, pitted


Ingredients For the pie filling:


  • 1 1/2 cup raw soaked and drained cashew halves
  • 1/2 cup pure maple syrup or agave
  • 1 1/2 cups pure pumpkin puree (Not pumpkin pie filling!)
  • 1/2 tsp. pure vanilla extract
  • 1 heaping tbsp.’s cinnamon, or to taste
  • 2 tsp. pumpkin spice, or to taste
  • 3 heaping tbsp.’s coconut oil
  • 10 medjool dates, pitted


You will also need:

  • 1 pie plate or desired dish
  • food processor
  • large bowl
  • medium-sized bowl
  • kettle


* For best results soak your cashews over night!!! Add the 1 1/2 cups raw cashew halves into a large bowl and cover with water. Give it a quick mix and leave them overnight on your countertop. *


Method:


  1. Place the dates in a medium-sized bowl and add boiled water to them from your kettle. Let them sit there 10-20 minutes to soften up.
  2. After your dates have softened you can remove 2 from the bowl and after pitting it add it to the food processor. Your now going to make your pie crust. Add in the 1 cup of raw cashews and the 1 tbsp. of shredded coconut. Use the pulse option in order to just combine the ingredients slightly. I then use the low setting on my food processor to combine the ingredients well.
  3. Remove the crust ingredients and add them to your pie plate. Use your fingers to press down the mixture and spread it out evenly. Set aside.
  4. Remove the other 10 dates from the water and remove the pits. Add them to the food processor.
  5. Strain the water out of your 1 1/2 cups cashews and add them to your food processor as well.
  6. Add in the 1 1/2 cups pure pumpkin puree, 1 heaping tbsp. cinnamon, 2 tsp. pumpkin spice and the 1/2 tsp. pure vanilla extract.
  7. Next add the 3 heaping tbsp.’s of coconut oil
  8. Pulse to just chop everything slightly and then use the high-powered option and blend well. I stop mine and use a spoon to scrape down the sides of the processor a couple of times in order to make sure that the nuts puree well.
  9. It should be a beautiful smooth consistency. Taste and adjust the spice as needed at this point.
  10. Transfer the pie filling into your pie plate. Smooth it out evenly and cover it up with clear cling wrap.
  11. Pop it into the freezer for at least 4- 6 hours until it’s set and firm. Once it’s set really well you can place it into the fridge. Take the pie out a few minutes before your going to slice and serve it so that it comes to room temperature.


* I’ve also been known just kept my pies in the freezer and only cut the slices I need. I let them come to room temperature and serve them.  My kids enjoy adding whipped cream on top of their pie slice but I eat mine plain. I think it’s perfect just like that!  🙂


Enjoy!


Raw Vegan Pumpkin Pie


Blueberry Chia Muffins

Healthy Blueberry Chia Muffins!

Healthy Blueberry Chia Muffins!


Mmmmmmm Blueberry Muffins!!!!! Healthy Blueberry muffins of course! 🙂 I make blueberry muffins often but usually use flaxmeal as my “eggs in my recipes. I played around with using Chia seeds as my “eggs” the last couple times I baked blueberry muffins. I love chia seeds and use them often in baking, smoothies and in my breakfasts. Chia seeds are a powerhouse of nutrition such as omega3 , protein, calcium and iron! They make me feel energized and they help me stay full longer so they are a staple in my kitchen. I use organic coconut oil in my muffins because I like the slight coconut taste it gives to the muffin and of course the health advantages but veggie oil can be substituted instead if needed. I usually use brown rice flour when I bake but I have also used spelt flour to make these muffins. Either way they turn out super yummy! As far as sugar goes I either use sucanat or coconut sugar in my baking. My kids prefer when I use the sucanat however. Anyway, as always this recipe is super easy to make!


Blueberry Chia Muffins


Ingredients:

  • 1 1/2 cups Flour ( I use brown rice flour or spelt flour)
  • 1 TBSP Chia seeds
  • 1/2 cup Water
  • 3/4 cup Almond Milk
  • 1/3 cup Coconut Oil
  • 1 1/4 cup Blueberries
  • 1/3 – 1/2 cup Sucanat or Coconut Sugar (I use 1/3 cup)
  • 2 TSP Baking Powder
  • pinch of Himalayan salt


Method:

  1. In a medium-sized bowl add 1 TBSP Chia seeds and 1/2 cup water to it. Mix and let it sit to thicken for 20-30 minutes. Give it a mix every now and then in that time period.
  2. Preheat the oven to 400 F
  3. In a large bowl add flour, sugar, salt and baking powder. Mix well.
  4. Add the coconut oil and milk into the chia mixture. Combine well.
  5. Place the wet ingredients into the dry ingredients and mix well.
  6. Gently fold in the blueberries into the mixture.


blueberries


blueberry chia batter


7. Line the muffin tin with paper liners or grease the baking tin.

8. Fill the muffin tin evenly with the mixture and pop it into the preheated 400 F oven. Bake for about 20 – 25 minutes. I find that mine are done at 25 minutes but every oven varies.

9. Once baked let them cool off in the muffin tin or they can also transferred to a cooling rack to cool off. Place in an airtight container once they have cooled down.

Healthy and so simple to make … Enjoy!


Blueberry Chia Muffins


*For a glimpse into my foodie life follow me on Instagram ~  VeganMommyDee and Twitter at MommyDeeOf3 🙂


Coconut Overnight Spelt Flakes

I make my overnight spelt flakes/oats very often. It makes breakfast much easier in the morning when your in a rush! Instead of having to wait for your spelt flakes/oats to cook all you would have to do is heat them up! So fast & easy! I use medium-sized mason jars to make my overnight oats because I find it’s easier to heat up in the morning. Instead of transferring the mixture into a pot I just add the jar right into a small pot of boiling water for a couple of minutes. Sometimes I will scoop the warmed up spelt/oats into a bowl or a lot of times I eat it right from the jar! 🙂 You can’t get any easier than that right? In my recipe I use unsweetened milk, coconut shavings and almond butter because I want to keep everything sugar-free. I prefer not to add additional sugar other than the natural occurring sugar in the banana and optional berry or fruit topping. If you like things on the sweeter side you could use the sweetened coconut, milk and nut butter.

overnight breakfast

Coconut Overnight Spelt Flakes

You will need:

  • 1/3 Cup Spelt Flakes or Old fashion Oats
  • 1 1/4 cup Almond & Coconut unsweetened milk or milk of choice
  • 1 TBSP Cinnamon
  • 1 tsp of unsweetened sulfate free shredded coconut
  • 1 TBSP Chia seeds
  • 1 TBSP all natural unsweetened Almond Butter
  • 1/3 cup berries or chopped fruit (optional)
  • 1 medium-sized mashed banana
  • 1 TBSP chopped walnuts

Method

  1. Add 1/3 cup Spelt Flakes, Oats or a combination of both which is also really good.
  2. Mash 1 medium-sized banana with a fork in a small bowl.
  3. Throw in the 1 TBSP of cinnamon, chia seeds & 1 tsp shredded coconut.
  4. Add in the mashed banana and chopped walnuts and combine.

Coconut overnight spelt flakes

5. Next add in the 1 1/4 cup of milk

overnight coconut spelt flakes

6. Give it a good mix to combine, put the lid on and place it in the fridge overnight.

In the morning …

  • Put a small pot of water on to boil

Heating up the overnight spelt flakes

  • Place the jar right into the pot and heat it up for a couple of minutes.
  • Once it’s hot enough for your liking remove the jar from the water and your going to add the 1 TBSP of almond butter into the mixture.
  • Give it a good mix and you can add 1/3 cup fresh chopped fruit or berries into it as well if you like. I do! 🙂
  • Eat it right from the jar or transfer it into a bowl.

yummy breakfast cereal

ENJOY your healthy breakfast! 🙂

Healthy Strawberry Quinoa Bake

This is one of my most often made recipes at my house. LOVE it! It’s crazy fast and easy to prepare too! Everyone who has eaten it can’t believe it’s made with quinoa. SURE IS and it tastes soooo good!

I add 2 TBSP of maple syrup to my recipe below but you can add an extra one if you enjoy things more on the sweeter side. You could also substitute it for agave if you wanted. One of my favourite things to throw into this bake is protein packed hemp hearts because it adds a bit of a nutty flavor to the bake. I often eat this strawberry quinoa bake for breakfast. Hey why not? It’s full of super healthy ingredients so I feel good about enjoying this yummy treat in the morning. See healthy can taste fantastic!!! 🙂


A slice of Strawberry Quinoa bake


Ingredients:


  • 1 Cup Quinoa Flakes
  • 1 TSP Cinnamon (I sometimes add more though :))
  • 2-3 TBSP Hemp hearts
  • 1-2 TBSP Dried Coconut flesh (I use Coconut Manna by Nutiva)
  • 1/4 Cup melted Coconut Oil
  • 2 Cups chopped Strawberries
  • 2-3 TBSP Pure Maple Syrup
  • 3 TBSP Flaxmeal (ground flax seeds)
  • 1 Cup Unsweetened Almond Milk


Method:


1. Preheat oven to 350 F

2. Add 1 cup of quinoa flakes into a baking dish (I use a round glass pie plate).

3. Mix in the cinnamon, hemp hearts and flaxmeal.


Quinoa Bake


4. Next add the 2 cups of strawberries and the dried coconut flesh.


Strawberries


5. Pour in 2-3 TBSP’s of pure maple syrup and the 1/4 cup coconut oil and give it a good mix.

6. Even it out in the baking dish and pour 1 cup of unsweetened almond milk on top.

7. Pop into the oven for 35 minutes at 350

8. Once Baked and removed from the oven allow to fully cool before cutting because it needs to set! If your in a hurry like I am at times scoop it into a bowl and eat it hot in a bowl.


Enjoy!


Strawberry Quinia Bake


Banana Oat Breakfast Bites with Cranberries & Walnuts

One of my favourite things to whip up are these easy to make Banana Oat Breakfast Bites!!! Many people make similar cookie versions to this recipe but the great thing is that everyone can make it their own way using ingredients that work for them. The great thing about this recipe is that you can tailor it to your own tastes and preferences! I find that they are a great idea for a fast breakfast when you’re in a hurry which really saves time. Have them with a healthy green smoothie and your good to go! I always have organic bananas on hand as well as oats so this recipe is made very often in my home. I also add dried sulfate free cranberries and walnuts sometimes too. The recipe I’m posting will be this version. 🙂 My kids like my vegan chocolate chip version best of course but then they are a treat and no longer a super healthy breakfast bite! LOL  You can also make them into cookies if you want but I like making mine smaller so that’s why I call them “bites”. I find that they are the perfect size to pop into a little container and pack them into a lunchbox or throw into a purse. They are a great on the go healthy snack. I always make sure I have healthy snacks in my purse because I’m vegan and it’s not always easy to find healthy vegan snacks on the go. Hey non vegans you should definitely be trying to bring healthy homemade snacks with you so you’re not tempted to buy sugary & fat filled treats while your on the run too!


Banana Oat Breakfast Bites with Cranberries & walnuts

Healthy Breakfast Bites

Healthy Breakfast Bites


Ingredients:

  • 2 regular sized Bananas
  • 1 TBSP Cinnamon
  • 2 cups Oats
  • 1  1/2 tsp. pure Vanilla extract
  • 1 TBSP Sulfate free Cranberries
  • Handful of chopped Walnuts


Method:

  1. In a medium-sized bowl mash both bananas with a fork really well.
  2. Add the vanilla and mix.
  3. Throw in the 2 cups of Oats and the 1 TBSP of Cinnamon. Combine well.
  4. Now you can go ahead and add the cranberries and walnuts. Give it another good mix.
  5. Shape into small round balls and place on a lined cookie sheet. Flatten the balls down slightly with the back of a teaspoon.
  6. Pop them into the oven for 10 minutes. If you want to make them bigger or into cookies then they will bake between 12-14 minutes.
  7. After removing them from the oven let them cool down on the pan. Transfer them to an airtight container once they have cooled off.


Other Versions of my Banana Oat Breakfast Bites:


Vegan Chip: My kids favourite version has 1/3 cup vegan chocolate chips thrown into the banana and oat mixture. They are such a tasty treat!

Plain Banana & Oat: I also make these banana bites without adding any dry fruit and nuts and they turn out great as well. Simple and super fast!

Protein Boost: I also make a version of these breakfast bites with peanut or almond butter added to the oat mixture! YUM! Just add 2 TBSP nut butter to your mixture. Be sure to combine it well  I bake them 10-12 minutes depending on their size. *I omit the cinnamon, chopped nuts and dried fruit for this version.*

Coconut & Almond: Toss in a handful of chopped almonds as your nut for these banana bites and instead of adding the cinnamon I throw in 1 TBSP of shredded coconut in it’s place.


*ENJOY your yummy & fast to make Banana Breakfast Bites! Have fun with them and try out different combinations to suit your needs*


*Makes 12-15 Banana Bites depending on their size*